Spare Parts - If you Bring Your Umbrella...
16/05/13 08:10 Filed in: Plumbing | Life Aboard
It always seemed to me if I actually did remember to bring my umbrella it wouldn’t rain... but if I forgot it then it would rain for sure!
It sometimes seems to be the same with spare parts on a cruising sailboat. Try to bring along the spares you think you might need and it’s actually something else you find broken.
Electric Heads
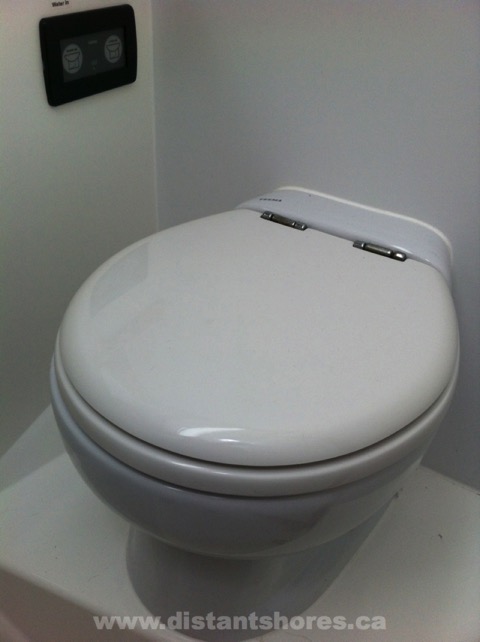
I know... many people "poo-poo" electric heads (warning.... there may be more head-related humour within) but we have been having a very positive experience with our Tecma electric heads on Distant Shores II. I cannot speak for other electric heads, but I have admired the simple design, solid workmanship and easy operation. And so far they have been reliable... right up until a few days ago when I began to suspect something was up with the aft heads.
Everything looked fine, and sounded fine when the button was pushed... however, something smelled funny...
I quick check of the bilge revealed the worst. A leak from the heads, and it wasn’t pretty.
Rather than start disassembling immediately I dove into the parts locker to find all the parts I had bought for these heads. Since I had not owned a Tecma until we bought this boat, a Southerly 49, (3 years ago) I hadn’t known what might need fixing. So I basically bought one of everything as a spare part.
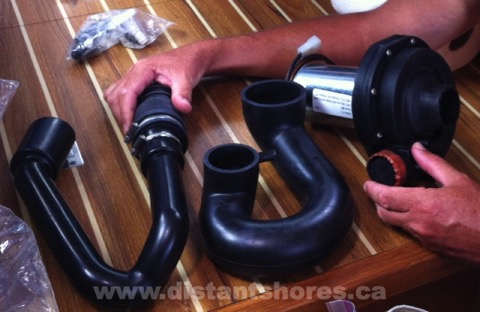
On the right is the large and heavy-duty macerator pump that sits in the bottom of the toilet. On the top of the picture (in a small bag) is the water injector fitting and a few other gaskets etc. Then there are the two very creatively shaped hoses that move the content/effluent/poo around. Note that all this actually fits inside the body of the toilet. Cunning engineering! In fact the design of this toilet is very beautifully shown here in what must be the sexiest toilet video ever made...
Anyway, here I am admiring the large pile of expensive spare parts, confident that one of these hoses was likely to be the odiferous cause of my woes, and proud that I had the parts.

Besides, playing with nice clean spare parts beats playing in the ....
So, time to roll up the sleeves and get to work. I will gloss over the first part of the project where I had to bail out the bilge, rinse it down and sterilize all... anyway that was done with no more than a smattering of "poo-jokes" some swearing and a nice long shower afterwards. There certainly was an incremental (or excremental?) increase in toilet references during this whole procedure :-)
Now to get to the actual repair. At this point I seem to have lost my enthusiasm for photography and did not record any more pictures.
1) Detach toilet - this entailed cutting the silicone sealing the whole unit in place, and removing the 4 screws holding it down.
2) Carefully lift toilet up - extra long hoses allow it to come up somewhat until you can undo the hose clamps
3) Disconnect hoses - I removed the saltwater intake hose, but the outflow hose had already come off!!
Problem Found. the hose clamp was not tightened down enough and the outflow fitting has slipped right out.
Result - direct discharge into the bilge whenever the toilet was operated! Yikes!!
Solution - re-assemble and tighten to insure the fitting doesn’t come off again!
During the disassembly procedure I carefully inspected all the hoses and the macerator. All appeared to be in top shape. No sign of age or any problems, so I did not actually need any of the spare parts.
Looking for the "silver-lining" in a generally "s__t" day, I can say it felt good to start the project knowing I had all the parts that could possibly be needed. I would not be faced with a long delay trying to get spare parts to get the head back in action.
Just like carrying an umbrella and not worrying that it might rain.
It sometimes seems to be the same with spare parts on a cruising sailboat. Try to bring along the spares you think you might need and it’s actually something else you find broken.
Electric Heads
I know... many people "poo-poo" electric heads (warning.... there may be more head-related humour within) but we have been having a very positive experience with our Tecma electric heads on Distant Shores II. I cannot speak for other electric heads, but I have admired the simple design, solid workmanship and easy operation. And so far they have been reliable... right up until a few days ago when I began to suspect something was up with the aft heads.
Everything looked fine, and sounded fine when the button was pushed... however, something smelled funny...
I quick check of the bilge revealed the worst. A leak from the heads, and it wasn’t pretty.
Rather than start disassembling immediately I dove into the parts locker to find all the parts I had bought for these heads. Since I had not owned a Tecma until we bought this boat, a Southerly 49, (3 years ago) I hadn’t known what might need fixing. So I basically bought one of everything as a spare part.
On the right is the large and heavy-duty macerator pump that sits in the bottom of the toilet. On the top of the picture (in a small bag) is the water injector fitting and a few other gaskets etc. Then there are the two very creatively shaped hoses that move the content/effluent/poo around. Note that all this actually fits inside the body of the toilet. Cunning engineering! In fact the design of this toilet is very beautifully shown here in what must be the sexiest toilet video ever made...
Anyway, here I am admiring the large pile of expensive spare parts, confident that one of these hoses was likely to be the odiferous cause of my woes, and proud that I had the parts.
Besides, playing with nice clean spare parts beats playing in the ....
So, time to roll up the sleeves and get to work. I will gloss over the first part of the project where I had to bail out the bilge, rinse it down and sterilize all... anyway that was done with no more than a smattering of "poo-jokes" some swearing and a nice long shower afterwards. There certainly was an incremental (or excremental?) increase in toilet references during this whole procedure :-)
Now to get to the actual repair. At this point I seem to have lost my enthusiasm for photography and did not record any more pictures.
1) Detach toilet - this entailed cutting the silicone sealing the whole unit in place, and removing the 4 screws holding it down.
2) Carefully lift toilet up - extra long hoses allow it to come up somewhat until you can undo the hose clamps
3) Disconnect hoses - I removed the saltwater intake hose, but the outflow hose had already come off!!
Problem Found. the hose clamp was not tightened down enough and the outflow fitting has slipped right out.
Result - direct discharge into the bilge whenever the toilet was operated! Yikes!!
Solution - re-assemble and tighten to insure the fitting doesn’t come off again!
During the disassembly procedure I carefully inspected all the hoses and the macerator. All appeared to be in top shape. No sign of age or any problems, so I did not actually need any of the spare parts.
Looking for the "silver-lining" in a generally "s__t" day, I can say it felt good to start the project knowing I had all the parts that could possibly be needed. I would not be faced with a long delay trying to get spare parts to get the head back in action.
Just like carrying an umbrella and not worrying that it might rain.
blog comments powered by Disqus