Weather4D Passage Routing Review - Updated
By Paul Shard, Copyright 2015. All rights reserved.
Scroll Down to see update following the passage
Do you wonder about the best way to plan a passage? Ask yourself questions such as “Can I make a passage before the next front comes in? How long will it take? When is the best time to tack, assuming the weather will be coming more from the east in the next few days?”
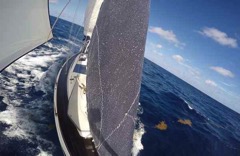
These are questions Sheryl and I have been asking ourselves since we are planning a big jump directly from the Exumas in the Bahamas down to Saint Martin in the Caribbean this week. It’s usually a tough upwind slog so planning the best day to leave might make all the difference between a tough bash to windward and an enjoyable passage. If we can catch a window where a front is approaching, we will grab the winds that go to the northwest and north which might allow us to make the necessary easting until we turn right and pick up the tradewinds from the east down to the Caribbean. This is the traditional strategy for this passage.
I have always done this planning using a manual method. I look at GRIB files and step through the passage – updating our course and guessing how many miles we will make in the next day. If the wind is on the beam we might make 7-8 knots – perhaps 175 miles in 24 hours. By then the forecast might predict winds a bit more on the nose so we will be slowing a bit.... hmmm. So perhaps if we leave a little earlier and motor a bit the first day we might pick up the winds so we get away from the weather...
Does this sound familiar? Or does the whole routing thing sound too complicated? What to do??
Weather4D Routing Software
How about an app that does the weather routing scenarios for you? Plus figures out alternative options for your course. Just plug in a start date, define the weather area you want to load for the GRIB file and Voila! (that’s French for “there you are!”)
I have been testing out an app called “Weather4D” and related app “iPolar” on my iPhone. A bit complicated at first but quite a revelation in route-planning. Let’s jump in!
Weather data can be displayed on many websites and using GRIB viewers so you can watch the weather animate through time over your upcoming route. But in these cases you still have to do the actual route planning. You will need to plot a proposed course and plot waypoints based on how far you think you might sail each day.
More Than just a Grib Viewer
Weather4D is not just a grib viewer – but so much more. It will do routing – advancing you along your planned course so you can visualize the weather as you will be making your passage. But how can it do that? How will the app know how fast we will be going?? For that you need the info on how fast you can sail on each heading relative to the wind. This is often represented by a “polar” predicted performance diagram.
Polar Performance Data
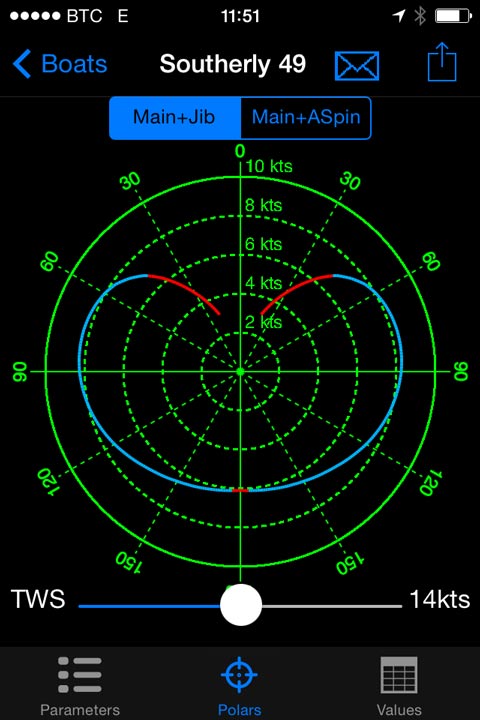
You can import Polar performance information for your own sailboat into the Weather4D app. I used the companion product called iPolar to generate a predicted polar sailing table by inputing LOA, LWL, beam, displacement and our Southerly 49 sail areas. Here is a capture screen of the diagram (showing the 14 knot performance set by the slider underneath). It appears to be fairly close to the polar diagram Southerly published for the 49. Good enough anyway to give a reasonable input for the program.
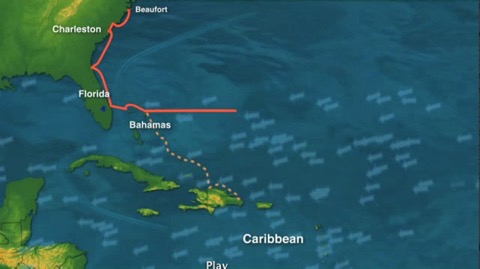
Before I get into much more complicated descriptions – here is a nice graphic to show why its all worth it. Weather4D has calculated how much we will be sailing along our planned route (red boat), and even generated a better suggest route (green boat).
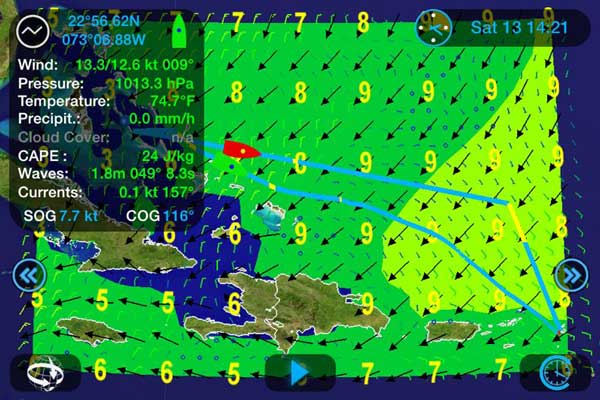
This is a scenario of our upcoming trip from the Exumas (upper left) to Saint Martin (lower right). We have just started and you can see our boat in red following along the route I input. Using the polar performance data we put in, Weather4D is applying the GRIB file data and sailing us along my course.
Wind and wave data is displayed on the panel – and I have set the screen to display the waves as background shading. Winds are the small arrows, waves are the black arrows.
However, notice the second route, also in blue but below my planned course. The green boat is the routing simulated alternative. This route is the optimum course calculated by Weather4D. Note below how (if all goes according to forecast :-) we might arrive earlier by the route the Weather4D routing algorithm is suggesting. The green boat is coming in more than 6-8 hours earlier!
The two routes compared: If we follow my route we will have a slow section (in yellow on the right side of the screen) where the winds are too light to make a good speed. Note the suggested lower route has much less yellow section.
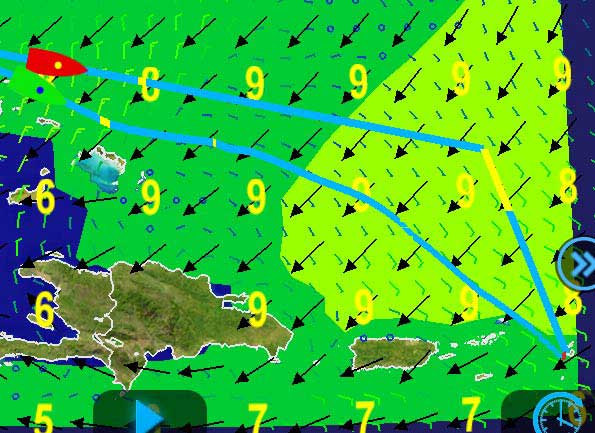
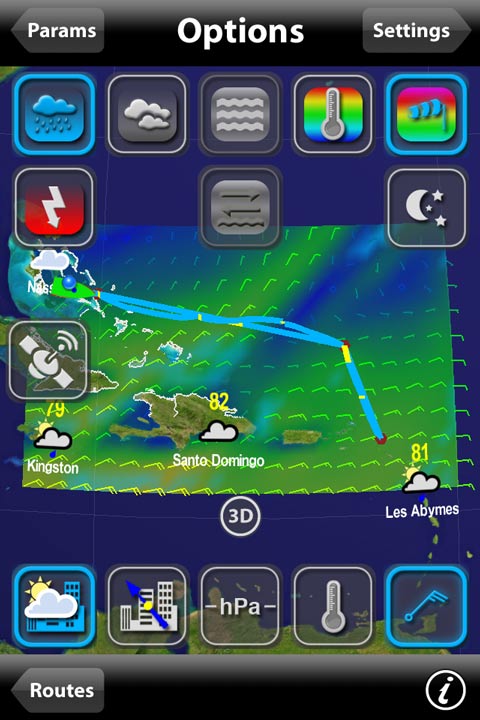
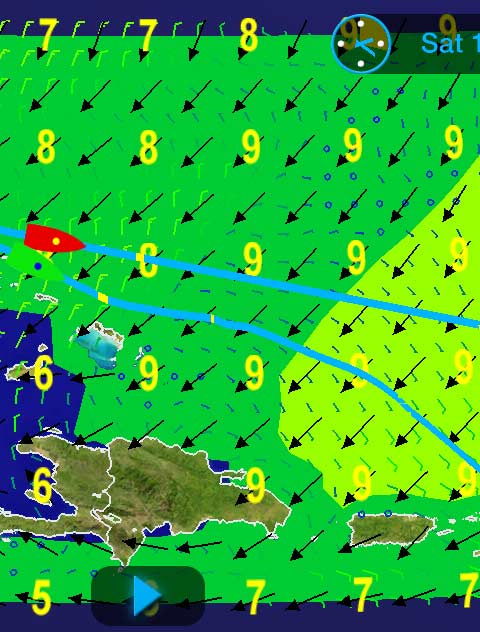
Weather routing is tough work and very “CPU-Intensive”. It takes a minute or so to calculate our best potential route. This is on an iPhone 4 so newer phones would be faster - I would recommend using this on a new iPad - Christmas is coming :-)
Here I snapped a screen-shot of the process... potential routes are being evaluated as time advances. You can see the far northern options aren't getting us so far as the southern options so it is concentrating more on them.
This will be an ongoing review and I will update it when we arrive in the Caribbean with our thoughts after the passage.
Weather Routing Software - Competition
Predictwind is $199/year and MaxSea has a weather routing module you can add in for $260. Although it might well not do all these packages can, Weather4D at $33 (plus 10.99 if you want iPolar) seems to be a useful package to run on your tablet or smartphone. We will report back on the passage experience when we arrive in Saint Martin in a week or so.
Has anyone got experience with Weather4D or the competing Predictwind Service or MaxSea? Please chime in with comments!
Update Dec 21/14 - Choosing the Route
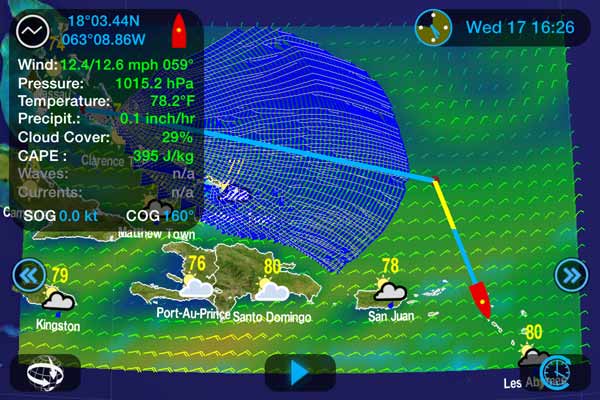
Greetings from St. Martin! What an amazing passage we just had sailing from the Bahamas! Looking at the suggested route above I decided to modify our route a bit south and plan one that would take us more directly to St Martin... see below for the plotter track we did on our Raymarine chartplotter which uses Navionics charts. This is our actual track in black, with red dots for log points, noon fixes etc.
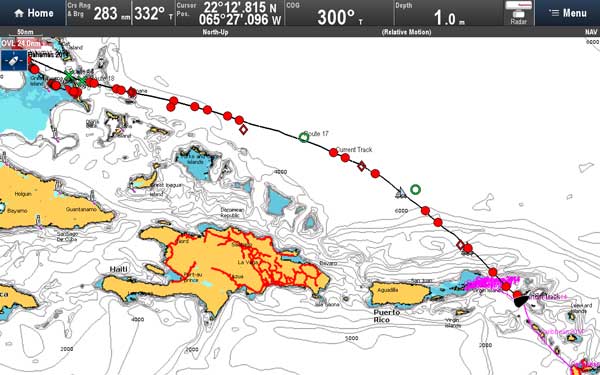
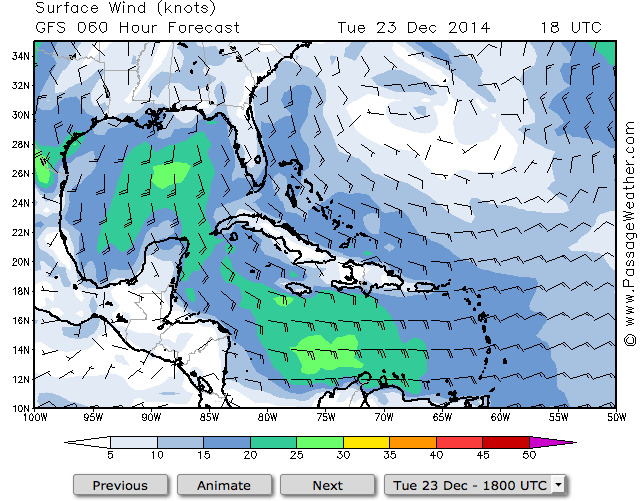
I know that winds in this area rarely come from the south so I wanted to stay further north in case our predicted N-NE winds didn’t last as long as the forecast said (which was that they were to swing more NE-ENE at the end of our passage). Here is a typical weather pattern for this time of year - lots of easterly winds - no chance of making the jump we just did.
Grab Your Weather Window
So how do you plan a successful passage? There are so many amazing tools we can use nowadays that it is much easier than it used to be to help plan a reasonable route for your boat and your crew. I will definitely be adding the regular use of the Weather4D tool to my passage planning routine from now on.
- Check general weather patterns if you aren’t familiar with the area... See Pilot Charts, cruising guides and general routing ideas such as Jimmy Cornell’s World Cruising Routes.
- Check the current situation with sites such as Passageweather
- Roughly evaluate your proposed route to see if you will have acceptable weather scenarios for your trip by drawing it out on a chart advancing your position by typical day’s run (judging from the forecast winds and seas)
- Simulate your route using Weather4D.
- Set Sail!
Thoughts on Weather Routing
Success of the weather routing will depend on 2 major factors...
The accuracy of weather forecasts - obviously less accurate the further out the forecast is. Your own boat and crew’s ability to meet your predicted performance.
Weather Forecast Accuracy
In our case the forecast we received turned out to be quite accurate right up to our arrival as the winds had shifted to NE-ENE by the 5th day. 12 hours into the passage we passed Rum Cay in the Bahamas and our Cellphone data link got a weather update but after that we had no more data connection. This meant we could not receive an updated grib file for Weather4D while we were underway but we did receive audio forecasts on our SSB radio.
Polar Diagram and Predicted Performance
Did we meet our predicted speeds? Well, mostly :-)
We regularly make 7.5-8 knots sailing on a beam reach and with steady winds we made progress as predicted. But the perfect world of Polar predicted performance doesn’t take into account normal wind fluctuations and a short-handed crew. With just the two of us on board there were a few occasions where we wouldn’t sail at our peak. For example, we will not use our big genoa with winds over 20 knots, so if it's evening and there are occasional gusts over 20 we will furl our genoa and put out our smaller self-tacking jib. This is a tough little 100% jib and it is quite capable of handling winds well above 20 knots so we can have a more relaxed time on our night watches. But this means we are sailing at 6 knots or so as the wind might be just 13-14 kts. If we had a racing crew we would be changing sails and keeping much closer to our “predicted performance”. I think if we had done this we would have come closer to the predicted arrival time. In the end we arrived at 5 o’clock in the afternoon - about 8 hours after Weather4D suggested we would get in. Still in time to celebrate a sunset in the lagoon at Saint Martin and have a nice night’s sleep.

Travel the world with us aboard Distant Shores
Order the Super Pack on DVD and get Season 1-10 Downloadable.
Order the Super Pack on Vimeo and we will send you the code for Season 10 as a bonus.
J&K Via Facebook“It’s because of your first season that we took off to go sailing and meet new people. 45k miles later, we're more indebted to you than ever. Thank you!”
Clear the Decks
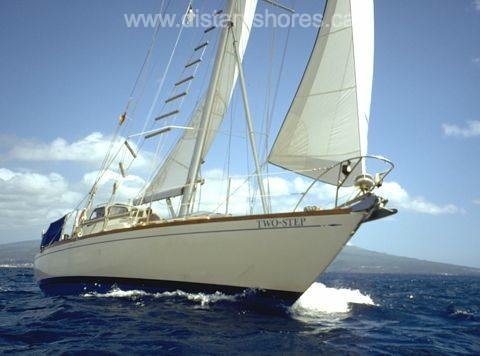
25 years ago when Sheryl and I were building and outfitting our first boat, Two-Step, we tried to imagine sailing her in a storm. As a result, we designed the deck layout so we could handle most tasks from the cockpit and bought heavy weather sails.
It is interesting to look back on our trip and see just how much heavy weather we encountered. In three years --1050 days of living aboard during an Atlantic circle trip -- we were under way for a total of 4500 hours or nearly 200 days full time. Of that time, 120 days were spent out of sight of land on passages ranging from 2 to 20 days in length and only 9 days were spent in heavy weather! Less than 1 percent of the cruise (8% of the time offshore) was spent in the storm conditions we had thought so much about.
In retrospect, it might seem strange to have put so much effort and expense into arrangements to benefit us for such a rare occurrence. But the time was certainly not misspent!
The heavy sails and rigging helped Two-Step to avoid problems -- a form of insurance that paid out, without an accident happening.
And by planning the deck layout for easy single-handing, we simplified the sailing at all times.
One of the most common “on deck” problems we have seen on cruising boats is too much clutter. We fell into this trap when we left Florida on our first blue water passage to Bermuda. We bought extra jerry jugs for fuel, water and gasoline, and even an extra propane can (besides the two in the vented propane locker). We set sail with nine 5-gallon jugs, the extra propane can and some teak boards (never know when you might need them), lashed on deck. This was more than 300 pounds of weight well above our centre of gravity! Two-Step wallowed off into the Gulf Stream, taking noticeably longer to recover when the seas slapped her.
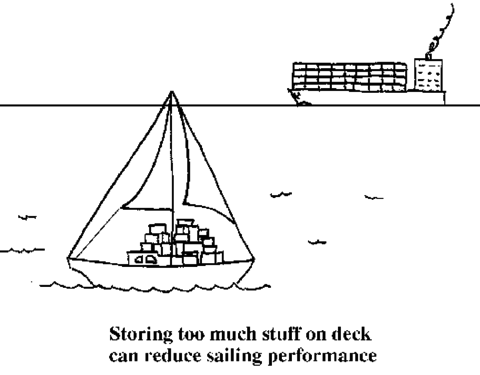
In a moderate blow 2 days later, a boarding wave tore the lashings and swept the gasoline jug and the propane can over the side. I prefer to think that I was being told to keep the deck clear. Since then we have eliminated all but two of the Jerry cans -- they each contain 5 gallons of water to be grabbed in case we ever have to abandon ship.
Nowadays on board Distant Shores II we keep the decks completely clear. Everything including fenders and jerry cans are stowed before we get underway. Sometimes I think people don't recognize us as a cruising boat because we are not cluttered enough! (Although the discerning eye will notice the wifi booster and the 20 foot high SSB antenna on the stern). Our boat performs just as well as she did when we bought her. She has no additional weight up on deck and sails better because of it.
If you have plans to lash jugs on deck it might be good to check with a designer and make sure the stanchions can handle the additional force. They were designed to save people from going overboard, not to have a 2X6 board and hundreds of pounds of stuff lashed on to them. Our mistake when we went offshore overloaded on Two-Step was that we didn't really need all that stuff. We couldn't possibly need the extra propane on a passage, nor the additional fuel or water. She was a small 37-footer by modern standards but she did have enough capacity in tanks to cross oceans when set up properly.
Setting up a boat “on-deck” for long-term and ocean cruising is really an exercise in common sense. If you plan to sail short-handed, as we and most cruisers do, organizing the deck for single-handing will allow the off-watch crew to get an undisturbed rest on passages. If you plan offshore passages it is important to consider heavy weather. Preparation is the best insurance you can get.
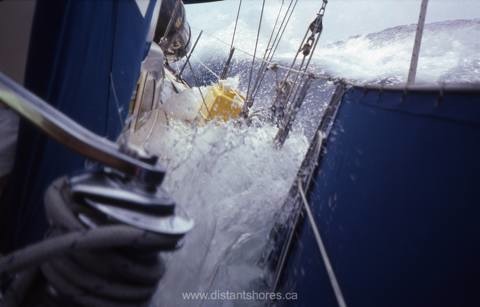
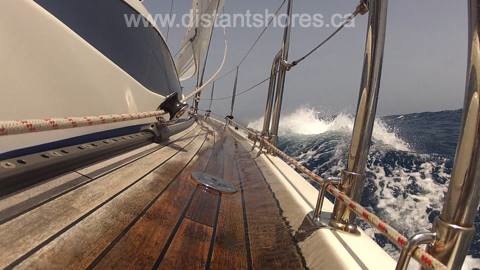
Here is a scene from Distant Shores Season 9 with stormy sailing conditions on the ARC Transatlantic Crossing.
The Best Sailboat Anchor
What's the best anchor for a cruising sailboat?
Over the past 25 years we have used a CQR, Delta anchors and Rocnas as primary anchors, and the Fortress, Fisherman and Danforth-copy as backup-spare or storm anchors. We have anchored for many thousands of nights and have ridden out some serious gales at anchor. We have anchored throughout the Caribbean, Bahamas, USA, Mediterranean and Europe. Plus I dove down to check our anchor, and the anchors on many other sailboats over those years.
If you are planning a cruise you might well be considering a new anchor - upgrading your anchor and ground tackle for the big adventure ahead. And at the risk of summarizing our MOST important finding over the years - upsize your ground tackle if you can! A larger anchor will definitely hold your sailboat more than a smaller one of the same kind! Manufacturers seem to recommend quite small anchors for boat size but the reality of successful world cruisers out there is "bigger is better". Note this Blog is just on anchors - for details on our full anchor setup click here Ideal Anchoring Setup.
Check out this clip from Let’s Go Cruising - Anchoring on Scope
Now ... on to the anchors.
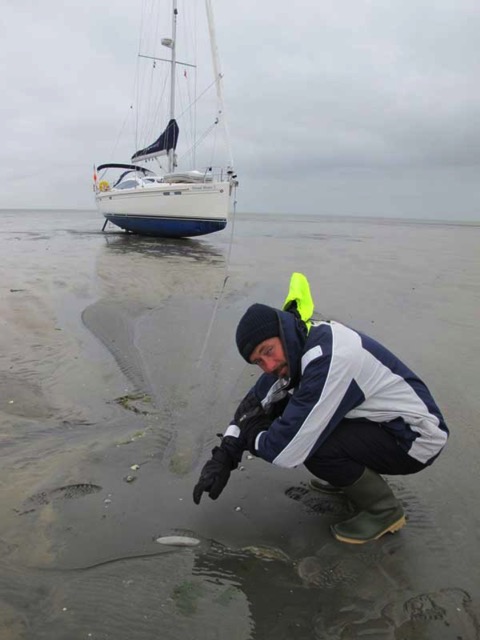
Here’s our Rocna well buried in the Wadden Sea of Holland
CQR
Our first sailboat was 37 foot long weighing about 18,000 pounds. We carried a 45 pound CQR as the primary anchor. Back in 1988 when we bought it the CQR was one of the most common anchors. Although it was upsized from the recommended 35 for our boat - we still found it was difficult to get it to set in many circumstances. We thought that was just how it was until we started diving on it and found it would mainly lie on its side and drag for quite a while before setting. We upgraded to a Delta 44 for the same boat and found it set much better.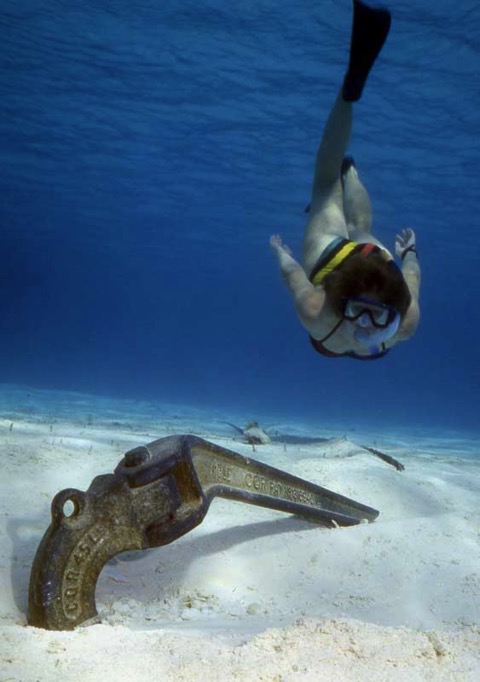
Sheryl checks out the CQR in Bahamas Sand
Delta
We used this anchor on both our 37 footer and also for a year on our 42 foot saiboat. Our Southerly 42 came with a 20kg (44lb) anchor. Why just 20kg? That was the recommended size by the manufacturer. It worked OK in the Caribbean and Bahamas but dragged a few times in the soft Chesapeake mud. I wish we had a 32kg model since that would have been more appropriate, and I would have been able to test it. Instead we switched over to test a Rocna 25kg. It would set in that same soft Chesapeake mud and also worked great everywhere else. But I still think it would have been good to try the heavier Delta. If you get one definitely upsize from the recommended one. From the tables they recommended a 16kg model for our 42. The 20 that Northshore put on will supposedly work for a 43 foot sailboat to over 50 feet. Come on guys! It is a very good anchor - great in weedy bottoms but must be upsized at least 1 model to work reliably as a primary anchor in my humble opinion!Rocna
We had a Rocna 25 (55 lbs) on our Southerly 42 and loved it. When we had the Southerly 49 sailboat built I opted for the Rocna again - this time a 33kg model (73 pounds). Our 33 model is listed on Westmarine at $879. Rocna has a very different sizing philosophy and seems to have much more realistic expectations in line with the average cruising sailor. Check out this comprehensive table from the Rocna website that builds in LOA plus displacement for improved sizing.Our 49 footer should have a 33kg or possibly the 40kg model. Very realistic. We find the Rocna sets very quickly and holds very well. It just works - and works very well. Setting in sand and regular mud it is great, and it even works well in that tricky "soupy" mud of the Chesapeake Bay. In grass it can have trouble like most anchors, but we have only dragged once - thick grass in Denmark. When we pulled it up the roll bar had clogged up with a huge ball of grass-weed and needed to be cleared before we could set it again. In those situations all anchors have difficulty. Another time where bigger is better! Perhaps the NEW Rocna with no roll bar will solve this?
Fortress
This is a special lightweight anchor excellent as a spare! It disassembles quickly and goes in its nifty bag making it perfect as a storm anchor. Made out of aluminum it is light for its holding power. We have carried them on board since 2007. Now on our 49 we have 2 models. A FX-23 (which confusingly weighs just 15lbs) plus a FX-37 which weighs 21lbs. We hung on that FX-37 in tropical storm force winds last summer and it didn't budge. Set in sand or mud the Fortress NEVER budges in our experience. A great backup anchor. We might add another larger one for storms as well. The FX-55 weighs just 32 pounds packing down in a slim bag. Here's their quite realistic Fortress sizing table. I wouldn't use the Fortress as a primary anchor since I don't think its as good in grass, and might be damaged in rocky conditions, but it seems unbeatable as the backup and secondary or storm anchor! We have used it many times and it has held perfectly. After heavy winds it is so well set that getting it up again requires the boat right overhead and winches employed!
Our Fortress FX23 set in sand with light grass
Fisherman
We had a 75 pound fisherman anchor that disassembled into 3 pieces. It is actually the heaviest anchor we have ever carried. The plan was to use it as a storm anchor on our 37 footer. We carried it for 3 years fulltime cruising and never used it once. It was so heavy that the one time we tried to assemble it and get it into the dinghy to take out was very daunting. We also had a smaller 35 pound model to help anchor us in grass. We tested this but found we were never able to get it to set at all. Yikes! If you don't know what a fisherman anchor looks like it's the "standard anchor" shape - many pubs, yacht clubs, restaurants and hotels use this type of anchor in their front lawns and flower beds. Seems a good place for them :-)Danforth type
We had a Danforth-style anchor as a backup on Two-Step (our 37 footer). It worked well but was difficult to stow since it did not disassemble like the Fortress. We use only the Fortress these days.Other Interesting Anchors
Above are all anchors we have had onboard our boats and have personal experience with. But there are so many anchors out there, and some we re interested in but haven’t had a chance to test. The good old Bruce anchor was a standard sight on cruising boats back in the day. In my diving experience I would find them set quite well in the bottom. Today Lewmar Claw is similar to this. A very heavy one of these would likely be a good and affordable choice (for our 49 footer I would choose a 110lb model at $369 from West Marine). Manson makes a competitor for the Rocna but we have no experience with these anchors. Many people like the Spade anchor (nifty selector program here) which take apart for easy stowage. The Spade anchor is somewhat similar to the Rocna in shape but without a roll bar. For our boat the 30kg steel Spade is$1150. They have an aluminum version too - 15kg version for $1800 wow!
Video of Testing
We filmed anchor tests of most of our anchors and have put these in our new video program “Let’s Go Cruising - Anchoring” on Vimeo.
Summary
Getting a good night’s sleep aboard your sailboat at anchor will often depend on your anchor. Can you trust it? A good primary anchor will be a key factor. And knowing you have spare anchors to handle all conditions is also important. Our experience has shown us that the new generation anchors like the Rocna are worth the investment.
So there you are - the best anchors we have been able to find and have tested aboard our sailboats for the past 25 years.
More Info? - Click here for full information on our Ideal Anchoring Setup
I know this will be a contentious issue, so go ahead and add comments below. What anchors have you found to be the best, and what problems have you had with them? Let’s hear your experiences!

Zinc Anode - Protection for your Boat
When we launched our first boat, S/V Two-Step, a Classic 37, and started sailing her in the Great Lakes back in the 80s I didn't know exactly what to do about our zincs. I understood we needed one on the propellor and apparently there was one in the engine, but what did they really do? And when should I be changing or inspecting them?
"What the heck is a zinc anyway and why?"
I quickly learned the answer when we later sailed in salt water. At the most basic, if you have a mix of different metals and add salt water you will get corrosion. Without getting too technical, zinc protects other metals on your boat exposed to the harsh underwater environment by being the "most likely to corrode".
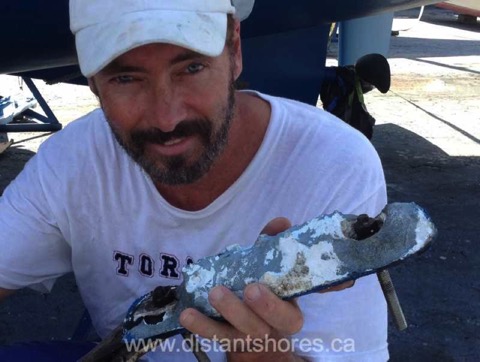
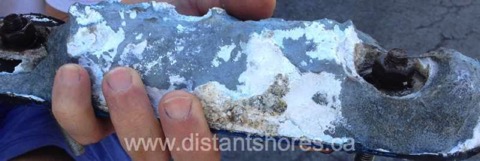
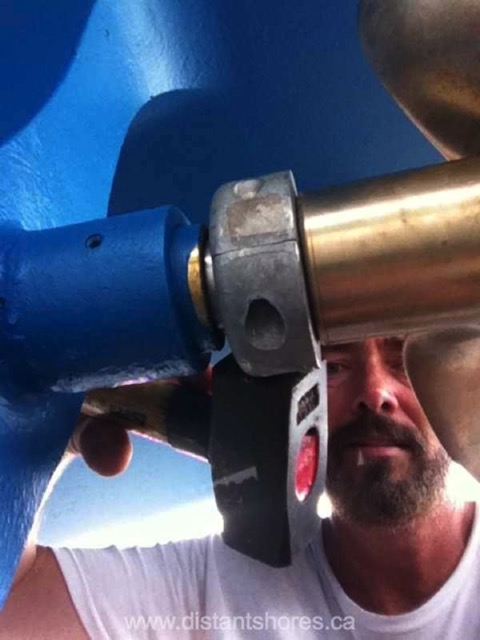
Note that Zincs only work when they are electrically connected to the items they are intended to protect. So the prop-shaft zincs are attached directly, as are any engine zincs and our bowthruster zinc. The main zinc below will be set up as part of a ships bonding system and will be connected inside the boat via the long bolts you see below. If you are worried your boat is set up incorrectly you might like the VERY technical description of bonding and lightning ground system here or testing procedure here.
There are a variety of metals on your boat's hull with salt water all around. A typical boat probably has some stainless steel (prop shafts and other components), different varieties of bronze (propellor, thruhulls etc) and possibly aluminum (outboard motor or outdrive components). With these different metals in salt water you get what amounts to a battery action. The different metals have different electrical charges and the most active will corrode - pieces of the metal dissolving and depositing on the less active metals.
The idea of using zinc is that the zinc becomes the anode in this battery and it will slowly corrode away protecting the other metals. We can call this a sacrificial anode since it sacrifices itself to protect the other metals. (Note other metals like Aluminum and Magnesium also can perform this function in fresh or brackish water - see below or this link)
How fast will this happen in salt water? Warm water speeds up this reaction, as does salinity and even pollution in the water. Hopefully your zincs will last at least 6 months, but until you have a chance to check them and find out, it is best to check them after a couple of months.
Change a Zinc when it is half gone. If you're in for a swim you can check zincs underwater and plan out the next change. The zinc on the engine (if it has one) will be easier since you can check and change it in the comfort of your engine room.
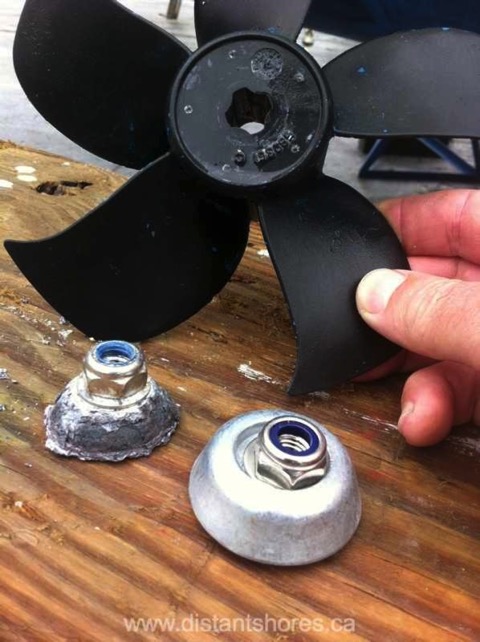
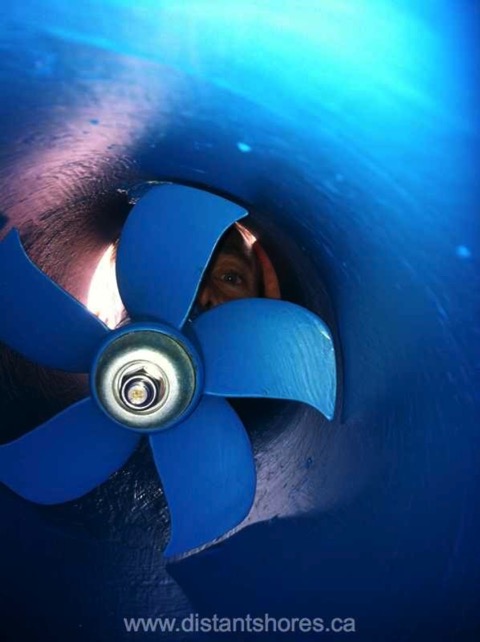
On Distant Shores II we have one large main zinc connected to the bonding system, plus 2 on the prop and shaft, and another up on the bowthruster. Here is the bowthruster zinc compared after 4 years. It has lasted well since there isn't much metal to protect - the bowthruster blades are plastic composite.
Our Autoprop has this custom Zinc and I replace it every year.
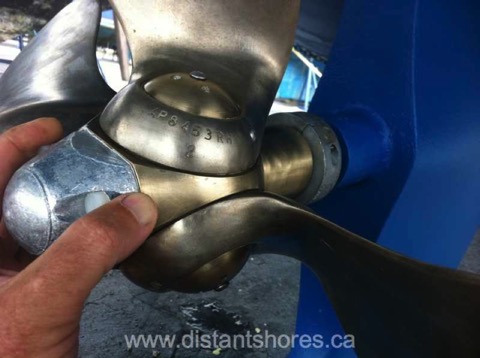
I also added a "donut" zinc to the prop shaft as extra protection in case the prop zinc fell off. When installing these shaft zincs you need to clean the shaft before attaching the zinc. Then tighten it up and give it a few gentle taps to settle it into place and retighten (just gentle :-)
And what about our first boat in the Great Lakes? Well, fresh water is a much less corrosive environment and corrosion is much slower. But, Zinc anodes do not work well in fresh water. Magnesium or aluminum are recommended, but be sure not to mix anodes. You can check with your engine or prop makers for the correct sacrificial anode for your cruising areas.
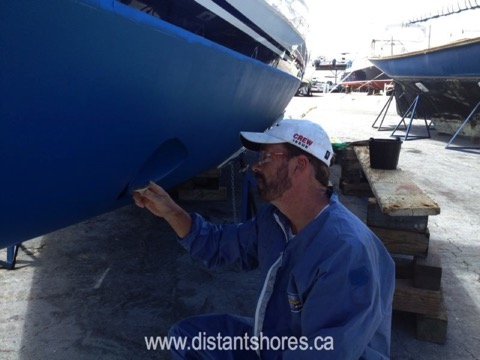
It is pretty easy to check and change the zincs - and absolutely important to the underwater health of your boat. The marine environment is hard on metal components, and you need to protect them.
Happy Boating!
Plan your passages around the world with us aboard Distant Shores

Order the Super Pack on DVD and get Season 1-10 Downloadable.
Order the Super Pack on Vimeo and we will send you the code for Season 10 as a bonus.
Problems in Paradise - Turning Frustrations into Adventure
It's been a busy week in the boat yard at Abaco Yacht Services in Green Turtle Cay but on Friday I had to take most of the day off to send out a part needing repair by courier.
Yes. A day.
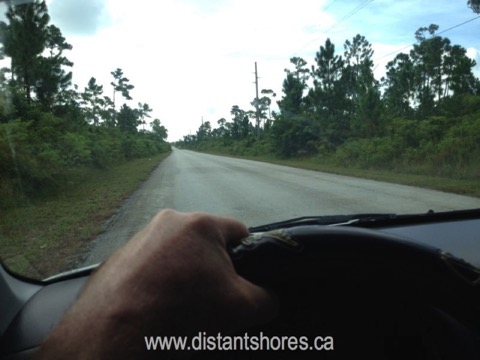
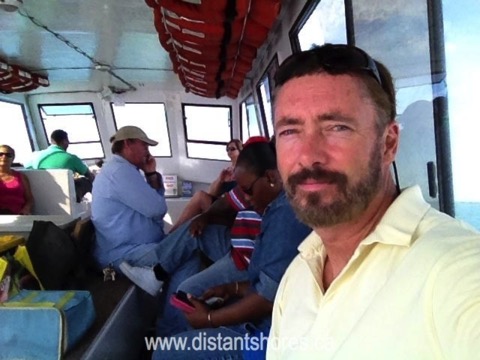
Sheryl and I like cruising in out-of-the-way places but there is no courier office on Green Turtle Cay so to get to the nearest FedEx office, which is in Marsh Harbour on the main island in the Abacos, I had to catch a ferry ($19 return fare), rent a car ($60 a day) since there are no buses and a taxi ride would be $80 EACH WAY, drive half an hour to town from the Treasure Cay ferry dock to get to the FedEx office in time for the 12 noon cut-off.
It was a pretty straight forward drive to town down the main highway but when I got to the FedEx office in Marsh Harbour they told me I had to go to the customs office at the airport to fill out Re-importation Papers. Good thing I'd left lots of time and had a car.
It was quite a process filling out the paperwork for re-importation and I was conscious that the clock was ticking but the customs officer was a real sweetheart as well as efficient and patient.
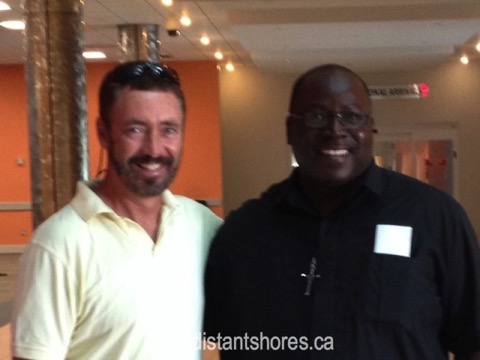
A highlight of my airport visit was to be recognized by Bahamian fans of the Distant Shores sailing TV series that Sheryl and I host and produce. Distant Shores airs in the Bahamas on AWE TV every Monday, Wednesday and Friday night on channel 267 and during our time in the islands we've met a lot of enthusiastic viewers at events we've attended and most recently at the phone centre when we went to top up our phone. It makes all the work worthwhile knowing that people enjoy the show!
After my visit to customs I had to do some repacking of my package but I got to the FedEx in time for the deadline with the package ready to go. The part is now winging it's way to overseas and launch of Distant Shores II is delayed for another few days.
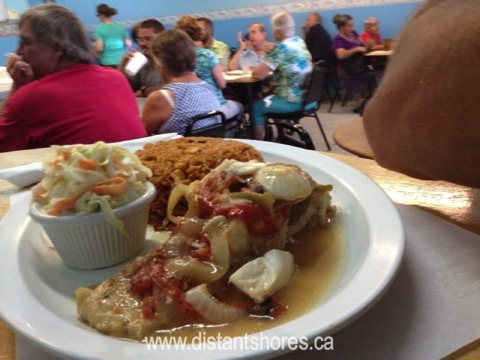
Since by now it was lunchtime I rewarded myself with lunch of stewed grouper with peas and rice and coleslaw, a Bahamian favourite, at a recommended local family restaurant. Might as well make the best of things :-)
And since I was in town I made a few other stops for supplies I couldn't get on Green Turtle Cay spreading the cost of my trip to the couriers.
People often ask us, “What do you do all day lazing around on your boat?” Well, this is an example of how things that are simple at home or in major centres can be a whole day exercise when you’re exploring small paradisiacal places.
It's just part of the cruising life and sometimes the price of paradise. But approaching these occurrences with a sense of fun can turn an unexpected frustration into an interesting adventure and make for an entertaining day out.
The O Words - Offshore, Ocean, Overnight
Many years ago a cruising lady we met in the Bahamas told me there were three words she didn't want to hear from her skipper. She said these were the O-Words - Ocean, Offshore and Overnight. The O-Words meant she had something to worry about in the upcoming voyage.
Hmmm, did my mate worry about such things? As a young cruising skipper I knew you have to keep the crew safe AND happy!
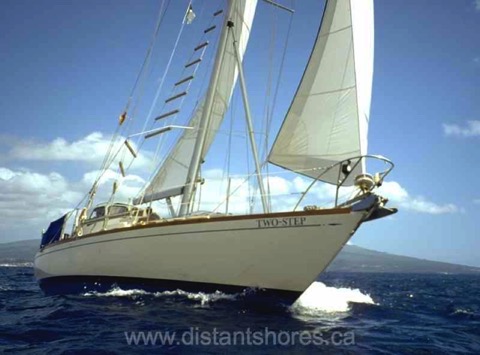
Our Classic 37, “Two-Step”, in the Azores following our third transatlantic passage.
(The voyages of Two-Step in Distant Shores seasons 1-4)
Sheryl and I were on our first international cruise when we met this lady. We'd travelled down the Intracoastal Waterway, then jumped across the Gulf Stream to the Bahamas to discover crystal blue waters, fine white sand and warm breezes. All our compatriot cruisers had sailed many miles also, mostly more than 1,500 miles, to get to this point. This cruising lady had experience but had been traumatized somewhere on that trip south. Sheryl and I were sailing on our 37-footer "Two-Step" and had been enjoying the trip taking things slowly and step-by-step building our confidence and experience. There was lots to learn but we knew it and had lots of fun. So how had we avoided being traumatized by the "O" Words?
Starting Out
Rewind 6 months… we had just begun our cruising adventures aboard our homebuilt Classic 37 sailboat and were very conscious of our lack of experience. We had both grown up with boats but powerboats, not sailboats, and following a dream of making a long-distance voyage to the tropics we had learned to sail in Georgian Bay four years prior, then had sailed a number of miles in Lake Ontario. We had even chartered in the British Virgin Islands (BVI) but we had never sailed Overnight at that point. We had sailed in the Ocean there but had not sailed Offshore. So we had only bagged one of the O-Words and since it was just sailing around the BVI perhaps it didn't even count as real Ocean sailing.
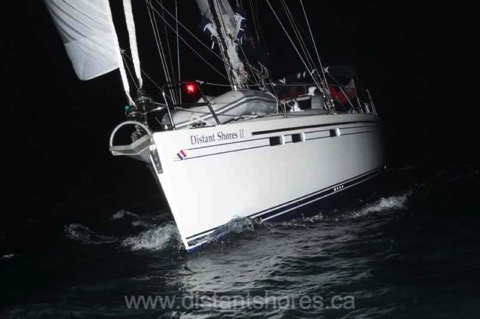
Completing our fifth transatlantic crossing aboard our Southerly 49, Distant Shores II
(Canary Islands to St. Lucia with the Atlantic Rally for Cruisers, Distant Shores season 9)
Mastering our first proper O-word came as we set sail from Toronto, Canada, in September 1989. We did our first Overnight across Lake Ontario, an inland sea with a lot of large Great Lakes ship traffic, to Oswego, New York, where we cleared into the USA and entered the New York State Canal system that led us to the Hudson River and New York City. From New York Harbour we headed out into the Ocean which we were pretty nervous about. So we didn't push. Although other more experienced sailors headed out before us we waited for really good weather and, getting up really early, sailed gently south down the coast in the Ocean in daylight hours to Atlantic City. We didn't want to combine Ocean with Overnight the first time out nor scare ourselves by trying it in rough weather. We promised one another if one of us wasn’t happy we would go back. Honouring that allowed us both to stretch ourselves a little knowing that we could count on the other to turn back if one of us was uncomfortable.
We did one more day of the Ocean sailing to Cape May, then next came the Chesapeake Bay, a wonderful cruising ground full of bays, rivers, and creeks for anchoring plus delightful towns for exploring. After making a few improvements to the boat at the numerous well-stocked chandleries there we headed down the Intracoastal Waterway in the fall of 1989. Massive Hurricane Hugo roared through in September and amongst other damages forced the closure of a bridge, and hence the stretch of ICW from Georgetown to Charleston, South Carolina, was blocked. We had been enjoying the delights of the ICW route south until this point and hadn't been in the Ocean since our quick hops from New York to Atlantic City and Cape May a month earlier.
First Overnight
I looked at the chart and with calm weather conditions in the forecast I saw the opportunity to plan our first Offshore Overnight passage. We would head out to the deepwater sea-buoys offshore and sail down the coast. Winds were forecast to be light and the seas were relatively calm. We weighed anchor around midnight and slid down the river with the tide heading offshore from Georgetown to arrive in Charleston SC in daylight. Stars twinkled overhead and smooth seas were a gentle introduction to our first Offshore Overnight sail. We both stayed up as we headed Offshore. We hadn't planned a real watch schedule for the first part of the night since it was just a few hours down the coast and I think we were both excited. We both stayed up until we picked up the outer sea buoy and then took turns napping. Now we always establish a proper watch schedule.
I think I was somewhat lucky that our first Offshore Overnight was so nice. It was a bit rougher as we beat the remaining 8 miles back inshore to the channel mouth on the approach to Charleston. But we had done it! We did our first Offshore Overnight on the Ocean and it had been the furthest Offshore we’d been up to that point. The first mate was happy and we celebrated with a dinner out in lovely Charleston. "Keep it fun for everyone!”. We both agreed that the tradition of a celebratory dinner out as a reward would make the tougher passages we might face in the future more bearable.
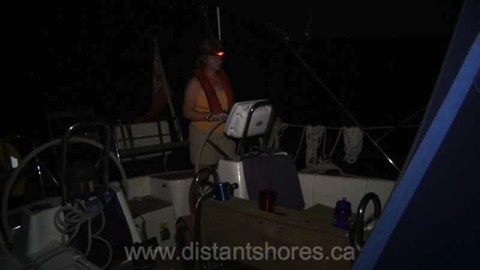
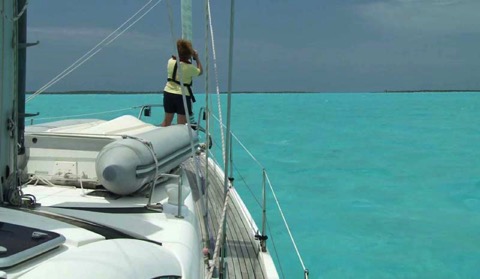
Sheryl on night watch sailing north through the Bahamas
(Distant Shores season 10)
If you are planning for your first "Offshore, Ocean, and/or Overnight” it makes sense to plan a trip that gives everyone a chance to appreciate the wonders of a nice experience. There will be time to tackle tougher conditions and rougher passage-making down the line but once your crew knows how nice it can be they will be ready to build on their experience in easier stages. The beauty of the open ocean can be worth a little discomfort, and the sense of accomplishment will help build the crew into a team.
Mission-O
Meeting more than one traumatized crewmember from other boats on that first trip south really had an effect on Sheryl and me. We could see how easy it could have been to avoid the conflicts and fears some of our fellow cruisers were experiencing by making simple changes in pace and/or attitude. From then on it became a mission to help people achieve safe, comfortable and harmonious voyages with their friends or loved ones through our writing and television programs.
On September 21st, Sheryl and I will be celebrating 25 years of international cruising together as well as the production of our 125th episode of the Distant Shores sailing TV series which features the world’s best sailing destinations and the launch of our new how-to series, “Let’s Go Cruising!”. The first DVD/download of “Let’s Go Cruising” will be about Anchoring using footage we’ve shot in many exotic locations around the world in all conditions. We invite you to subscribe to our newsletter to receive updates on this new series plus tips and advice as well as a free download of “Southern Exumas, Bahamas”, a half-hour episode from season 5 of the Distant Shores sailing TV series as a bonus gift.
Please share your experience. How did you deal with your first Overnight sail or prepare your crew for theirs?
Plan your passages around the world with us aboard Distant Shores
Order the Super Pack on DVD and get Season 1-10 Downloadable.
Order the Super Pack on Vimeo and we will send you the code for Season 10 as a bonus.
How to Find a Good Boatyard while Cruising
The boatyard at Abaco Yacht Services, Green Turtle Cay, Bahamas
Recently Paul and I made a change to our cruising plans for the summer. The freedom to be flexible and completely change your plans while cruising is one of the appeals of the sailing lifestyle. “Make a plan and stick to it” doesn't always serve you when cruising. You may be held up by weather or break-downs, friends may recommend a great destination you hadn't considered but that now you want to sail to or perhaps you realize you want to spend more time in the place that you already are. Maybe a work opportunity comes along that you want to take advantage of.
Our original plan for this summer had been to sail north from the Bahamas to explore more of the east coast of the U.S., but for various reasons we decided to extend our time in the Bahamas and store the boat there for a few weeks while we flew home to complete a work project. Once the decision had been made, we then had to find a place to safely store the boat in the Bahamas for a few weeks during July and August while we were back in Canada.
The Bahamas are located in the hurricane belt and July and August are smack in the middle of the hurricane season (June to November). We needed a really secure way to store the boat that met the criteria for hurricane coverage by our yacht insurance, Pantaenius Yacht Insurance who we have insured with for many years. We also needed to have easy access to an airport since we were flying home.
We were in George Town, Great Exuma, when we made the decision to leave the boat in the Bahamas. There is an international airport there plus good hurricane holes nearby on Stocking Island where you can rent a hurricane mooring from Kevali House Marina or St. Francis Marina. However all the hurricane moorings were fully booked.
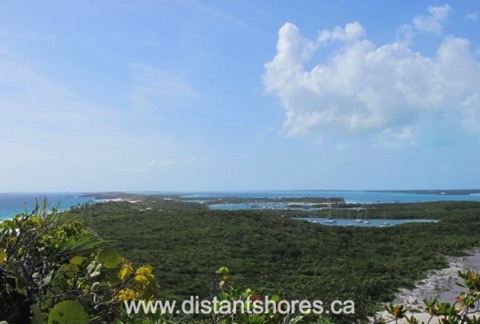
Stocking Island showing the hurricane holes to the right
The next option was to leave the boat in the water at Marina Emerald Bay, part of the Sandals resort on Great Exuma just north of George Town, but although this marina is a great place to stay short-term it doesn't offer full protection from surge. Many of our friends store their boats there but we just didn't feel confident leaving Distant Shores II there during hurricane season. We depend on our boat for our livelihood so any damage or loss would seriously affect us. Generally when we leave the boat for more than a couple of weeks, we prefer to haul the boat out of the water and dry-store it. That way we're not worrying about it taking on water and sinking, lines possibly chafing or some other boat hitting it.
So now we had to find a good boat yard that met our requirements.
First we put out a call on VHF radio asking for recommendations on the George Town Cruisers Net, a gathering of cruisers via VHF radio that meet every morning to share information on weather, boating topics and local events. Since we were there is low season, most of the cruisers in the area were visiting from Florida so didn't have experience storing their boats in the Bahamas but general knowledge seemed to be that the only reliable yards for dry-storage during hurricane season in the Bahamas were in the Abacos, the most northern group of the Bahamas, although no one could provide specifics.
We then went to the internet to do some research, asking for recommendations on Facebook groups and cruisers forums. We also searched on “boatyards in the Bahamas” and found many references to a couple of yards in the Abacos. I also found several cruisers blogs that discussed dry-storing their boats in the Bahamas. The consensus seemed to be Abaco Yacht Services on Green Turtle Cay in the Abacos was a good choice.
Checking our cruising guides, this yard was mentioned and recommended.
We then took a look at the location via Google Earth as well as our charts and verified that the yard was situated in a secure protected location. In fact, we realized that we had seen the yard on a previous cruise through the Abacos and had been impressed by the cleanliness and orderliness of this yard.
We called for rates and availability and booked a haul-out conditional on approval by visual inspection when we arrived. I had a few additional questions and when I had to leave voicemail my call was always answered promptly. The receptionist also gave me good advice on booking our flights home. Very helpful.
Abaco Yacht Services also met a few of our other criteria – we could stay on our boat while working on it in the yard (although they did have air conditioned accommodation available on site which we decided to take advantage of), we could do our own work on the boat (bottom paint needed to be done when we returned) and the boat yard was close to two airports – Treasure Cay and Marsh Harbour.
So in early July we sailed north through the Exumas to Abacos and anchored off the town of New Plymouth on Green Turtle Cay. It was an easy dinghy ride over to the yard and when we headed up to the office one of the yard staff immediately came over to see if they could help us. This showed friendliness and customer service but also attention to security. Both good.
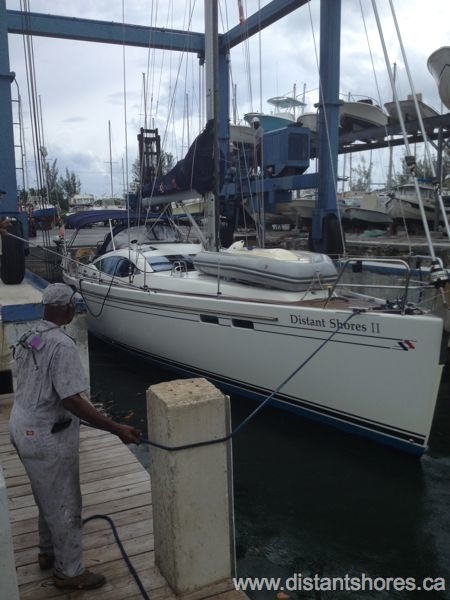
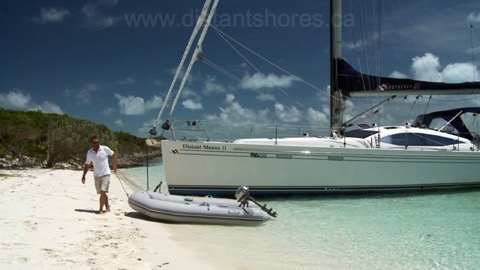
Distant Shores II preparing for haul-out at Abaco Yacht Services
As we recalled, the yard was spotless and well organized. There was a locked gate, shower facilities, no derelict boats. Work was being done on well-blocked boats. We spoke to a couple of cruisers who were working on their own boats there and they all who had good things to say about their experiences keeping their boats there.
We quickly confirmed our booking and proceeded to book our flights home. Haul-out went smoothly and efficiently and we left feeling confident our boat was in good hands while we were away.
There are many reasons you might want to find a good boat yard when you're out cruising – to have maintenance or repair work done to your boat; to haul-out to check the hull, propellor or to clean the bottom or, like us, to dry-store the boat while you fly home for a few weeks or months are examples.
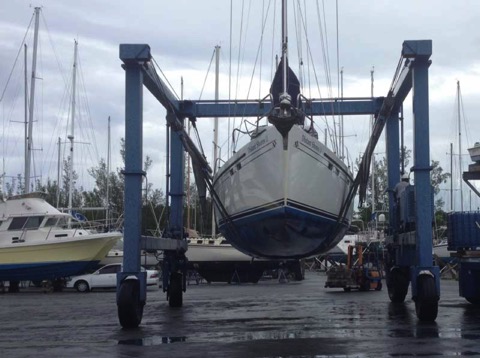
Distant Shores II with keel retracted moving through the boat yard
Here are the steps we recommend to find a good boat yard.
1. Clarify Your Criteria
Before you begin your research get clear on the reasons and criteria for needing a boatyard. In our case it was location, the cost, the ability to liveaboard in the yard and work on the boat ourselves, a secure place to store for hurricane season and proximity to airports. Other things to consider are does the yard have the ability to lift your boat? In France when we needed to have our mast taken down to travel through the canals we discovered that the two popular yards offering this service couldn't handle a mast our size. If you are planning to have work done do they have the proper qualifications to carry it out? If yes, will there be a language barrier that may cause problems. Get really clear on what you need and want to avoid disappointment and frustration.
2. Ask for Recommendations by Friends or from the Cruising Community
This is the best place to start for first-hand experience whether you do it in person via email , VHF net or other method.
3.Check Online
Blogs, articles, forums/groups, and wiki sites are great sources of information. Post your questions and follow up on the info provided.
4. See What Cruising Guides for the Area Recommend
Cruising guides are written by experts. See what they recommend to cross-reference your other research on boatyards available. Email them with your questions, if possible.
5. Contact the Yard(s)
Once you have narrowed down the options, contact the yard(s) you are considering based on your initial research and confirm that they can meet your criteria. Take this opportunity to ask your questions and clarity any concerns.
6. Ask for Rates or a Quote
It's good to get information on rates in writing and be sure there are no unexpected additional charges. Check on methods of payment accepted, whether a deposit is needed or if payment is required up-front.
6. Do a Visual Check
Before committing to a boat yard, do a visual check if possible. Is the yard, clean, tidy, and well-organized? Is their attention to security? If you're having work done check for certificates showing qualifications of the technicians. Are their tools organized or rusty and disorganized? Talk to boaters who have their boats in the yard at the time for their opinions on the boat yard.
7. Make a Reservation
Once you feel confident that the boatyard in question meets all your criteria, book your reservation and prepare your boat for haul-out.
8 Steps for Finding a Good Anchorage
You're designing a cruise and want to plan out a few good anchorages along your route. How to begin?
Distant Shores II anchored off Thunderball Cave, Staniel Cay, Exumas, Bahamas
Sheryl and I have been cruising for 25 years and have anchored in hundreds of places around the world in all types of conditions. We love the freedom and privacy that anchoring provides and that it allows you to stay in some amazing places that you might not be able to get to in any other way. Another perk is that anchoring saves you money compared to regularly staying in marinas.
Here are the eight steps we go through for determining if an anchorage is a good.
1. Clarify Your Personal Criteria
The first thing to do when choosing an anchorage is to clarify the reason why you want to anchor in the first place. Do you just want to anchor for lunch and a swim in a quiet place? Are there good reefs for diving or fishing close by you want to investigate? Or are you on a long-term cruise and want to anchor near towns for supplies without the expense of overnighting in marinas? Are there attractions ashore that you want to visit? Is there an anchorage near the base where you have to return your charter boat early the next morning?
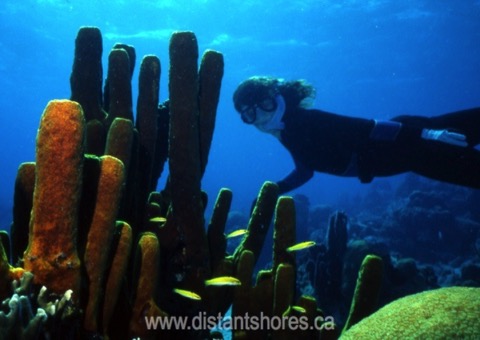
We love to snorkel so search for anchorages close to interesting shallow reefs
Often there will be several criteria when searching for ideal anchorages for you and your crew, and your criteria and needs will change throughout your voyage.
2. Check Your Charts and Cruising Guides
Once you have a rough idea of the type of anchorage you are looking for and why, a good starting point is to go over the charts and cruising guides for the area you plan to cruise in. Anchorages will be marked with the standard anchoring symbol and cruising guides will offer recommendations. However, just because they're marked as an anchorage doesn't necessarily mean they will suit you best. For example, they may be too shallow for your deep draft boat or require that you get under a bridge to get to that's too low for your mast to get under.
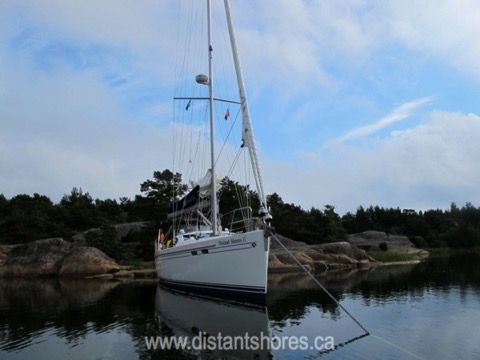
Anchored stern-to the shore in Sweden
And just because a bay or cove or spot off the shoreline isn't marked as an anchorage on the chart doesn't mean you have to rule it out as a possibility. As long as the place of your choice is not marked as a restricted area and meets the basic criteria of offering protection from wind, waves and weather; has a bottom that will provide good holding, has sufficient depth, and offers enough swinging room for your boat, it's good to go.
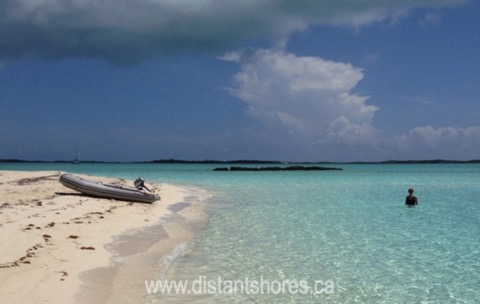
Anchored off Twin Cay, Exumas, Bahamas. Good in calm conditions with quiet beaches and swimming nearby.
3. Determine if There is Protection from Wind, Waves and Weather
If you anchor in a place that appeals to you, will it be protected from wind, waves and weather? This can change if there is a wind shift, increase in wind strength, or a new weather system moving in that could cause you grief. Few anchorages offer protection from all directions. Check current weather forecasts for the period of time you plan to spend there swinging on the hook to make sure you will be safe from a building swell in all predicted conditions.
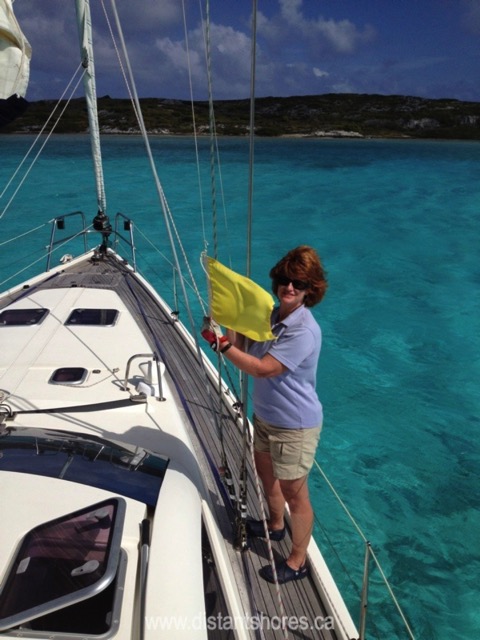
Anchored at Cockburn Harbour, South Caicos, Turks and Caicos. It’s a port of call and we needed to check in.
4. Check the Depth
Even if a harbour looks well protected, if there is too little or too much depth for your boat to anchor safely it's not worth considering. On average we find cruising guides seem to mark anchorages based on yachts with an average draft of 6 feet (1.8 m). If the draft of your boat is greater, you may have to find other options from the recommended anchorages in some cases.
You also have to consider tidal ranges if applicable. You may find sufficient water to anchor in when you first arrive but if the tide drops will you still be afloat or grounded at anchor? Best to check the tide charts in advance.
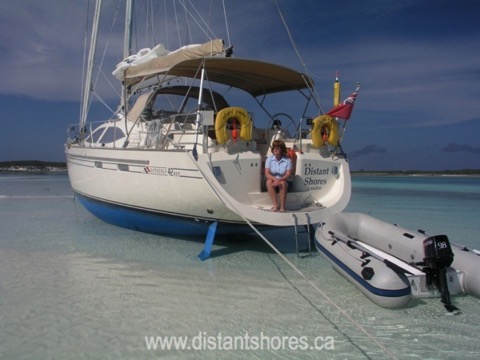
High and dry at low tide. That’s okay for Distant Shores.
Southerly Yachts are built to dry out and have retracting keels.
Too much depth can also be a problem. You may not have sufficient anchor rode to achieve the proper scope. Chain rode helps with this since the weight of the chain allows you to use less scope, but if the water is too deep and you don't have enough rode to keep a good angle on the anchor (the anchor holds better if it pulls parallel to the bottom) the anchor is likely to just pull out or drag.
5. Check the Bottom
You want to sleep through the night and not worry about your anchor dragging. Sand and mud offer the best holding properties for your anchor. This information is usually shown on charts with “S” for sand and “M” for mud. Sometimes the sketch charts in cruising guides show “good holding” or “poor holding”. Be careful of weedy areas which can cause your anchor to foul and drag, scoured bottoms where there is strong current and not much for your hook to grab into, rocky spots or areas marked “foul” where your anchor might get hung up, and areas where underwater cables are shown on the chart. In tropical areas you can often see the bottom to find a good sandy patch.
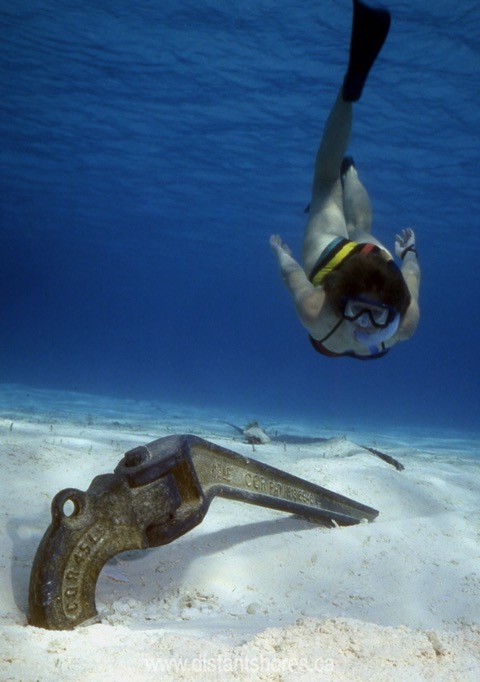
Sand provides good holding. Sheryl dives on our old CQR anchor on S/V Two-Step.
We now use Rocna anchors.
6. Determine if There is Room to Swing
Next to consider is if there is enough room for your boat to swing using the recommended five to one scope. Boats rarely sit still and with changing conditions can swing in a complete circle around the anchor. Is there room for this to happen safely or will you hit another boat or fixed object? Are you anchored near other boats that will swing the same way and at a similar speed that your boat will? For example, boats on moorings will swing in quite a small circle compared to yours at anchor. Lighter boats with more windage could swing faster than your boat creating a collision situation.
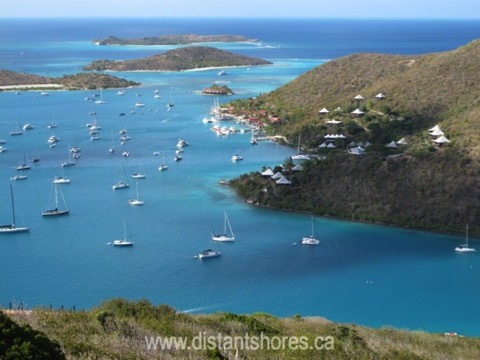
Boats anchored in Elizabeth Harbour, George Town, Great Exuma, Bahamas.
Swinging room for lots of boats here!
When Sheryl and I arrive at an anchorage where there are other boats we make it a practice to say hello to the owners of boats we might be anchoring close to, to ask how much rode they have out and if they can point to the location of their anchor. This will help you to place your anchor for safe swinging room and open up friendly discussion with fellow boaters.
7. Create a Plan B
It's always a good idea to have a Plan B up your sleeve if you get caught out. For example, you find a protected anchorage but the wind shifts. Can you simply move to the other side of the island or other end of the bay? Can you do it in the dark? Could you ride it out? Is there another anchorage or marina nearby? Will you need to head out into open water and ride it out at sea? If you can't move safely will throwing out a second anchor help you deal with increased conditions? If it's too crowded or the holding poor what's the next option?
North Sound, British Virgin Islands.
Many options for anchoring or picking up a mooring off Bitter End Yacht Club and Saba Rock
8. Arrive Early
Days on the water are precious so it's tempting to pack in as much sailing and as many miles as you can in daylight hours, but arriving at an anchorage right at sunset or in the dark isn't a good idea. Then you have no time to make changes or to go to Plan B if necessary. Sometimes you'll discover your planned anchorage is too crowded for safety, or you'll find it full of lobster pots or that a fish farm has been built there since the last update of your chart! Maybe it's more developed than you'd realized or more noisy than you expected.
Arriving at an anchorage in good time reduces your stress throughout the day since you know you'll have options no matter what. Early arrival allows you time to relax, watch the anchor and feel confident that it is holding, move to a new place if it isn't, plan the next few days, cook, write, swim or do some exploring.
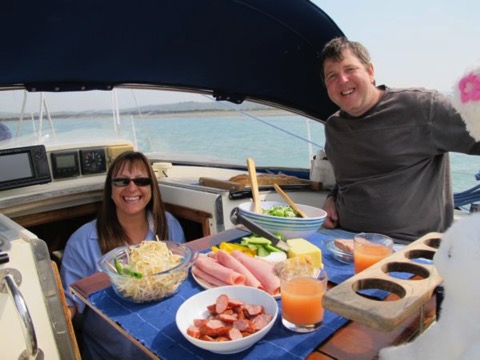
Lunch at anchor with friends Yvette and Pete aboard M’Lady, Isle of Wight, England
Anchoring is one of the joys of cruising, offering you fresh air, privacy, and a sense of self-sufficiency so planning it well adds greatly to your confidence and pleasure as you travel on your boat.
Explore beautiful anchorages around the world with us aboard Distant Shores
Order the Super Pack on DVD and get Season 1-10 Downloadable.
Order the Super Pack on Vimeo and we will send you the code for Season 10 as a bonus. Email us for details.
5 Tips to Finding Your Own Sailor's Paradise
This past two weeks have been busy back in the Shard Multimedia studio as we are working full-time editing the next episode of Distant Shores - number 122. It's about the George Town area in the Exumas, Bahamas, and it covers some of the most beautiful waters we have cruised anywhere! It got me thinking about how we plan our cruises to find and enjoy amazing sailing paradises. Sheryl and I have cruised for nearly 25 years and in that time our cruising style has evolved and improved. Many people have asked us how we plan our cruises, so I took time out from editing today to put together my 5 top tips for finding your own sailor's paradise to help you design the perfect cruise.
- Plan time to explore - schedules and deadlines make it more difficult to find that perfect place - and when you do you might have no time left to enjoy it. We recommend leaving plenty of extra time in your cruising plan to allow you to take advantage of opportunities. We often make big jumps between destinations that we would like to spend more time at. This year we planned extra time in the British Virgin Islands, a favourite destination, then jumped directly to the Turks & Caicos and then the Bahamas where we planned a long cruise leaving time to explore more leisurely.
- Get off the main route - don't always just follow the purple line marked on the chart. Increasingly we see sailors running from waypoint to waypoint on a standard cruise agenda. This may work well for you if you don't have a plan ready yet. For instance, the traditional thorny path route to the Caribbean gets you through the standard Bahamian destinations pretty quickly, so you could plan more time on the return trip to poke into places you just got a taste of on the way down.
- Ask like-minded cruising sailors for recommendations. On the dock or in that characterful sailors' bar (eg. Peter's Cafe Sport in the Azores, Chat-n-Chill in the Bahamas, Yacht Marine in Marmaris Turkey) you can ask sailors coming the other way what their favourite stops were. But also check out how they cruise to see if what they like would appeal to you. Many of our best cruises started over a drink or dinner with fellow voyagers.
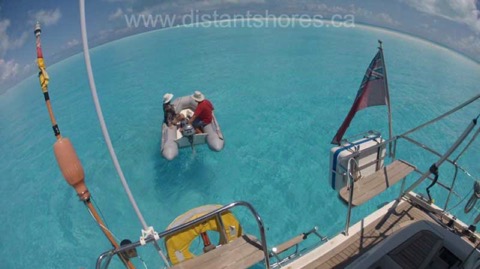
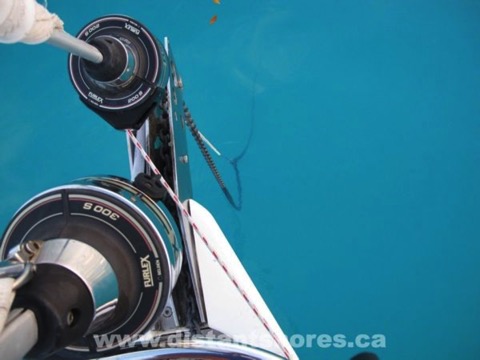
- Explore in the dinghy. Even inside an anchorage you can find that ideal spot. When you get to a new place you can see how things look from the other side of the bay. You might find that perfect hidey-hole for an extended stay. We have a number of this spots in various places where we wiggle in to a sweet anchorage and spend a few days just soaking in the ambience! We sometimes carry a portable "dinghy depth sounder" in the form of a leadline (see below) to check if there is enough depth to bring in the mothership.
- Check all resources - cruising guides, chart kits etc. In the Bahamas we see many people using just one chart kit. We spoke with more than few cruisers who complained the place was too crowded - but they were all on the same route! We have the Explorer Charts, plus 5 different cruising guides (Yachtsman's guide, Steve Pavlidis Guides, Abacos Guide) Navionics Platinum Charts (with satellite overlay) plus we use Google Earth to explore other potential options. In areas like the Bahamas many potential interesting anchorages are not shown just because there are too many options. Check out virtually the entire western side of the Exuma islands chain. There are many interesting spots to anchor.
What’s your paradise look like? Please post your pix or comments below!
Additional Resources
Dinghy Depth Sounder - given to us as a gift by fellow cruisers years ago. We still use this and its easy to make. It's just 25 feet of light line with a fishing sinker on the end. Coloured ribbons mark the depths and there is a hand-loop in the end. Ours has ribbons every 2 feet - the first 3 are red, then 3 yellow then 3 blue. If you make a special one for your boat you can mark depth up to your draft in red then additional marks in another colour. Just knot the line around the ribbon and you are ready to explore! Other cruisers use a portable electronic sounder here.
Join our email list and get hints, technical articles and tips plus videos to help you achieve your cruising dreams.
- FREE 1/2 hour video on cruising the Exuma Islands in the Bahamas
- Technical Blog shows you how to deal with issues facing the cruising sailor
- Destination information from some of the world's best cruising areas
- Special discounts and promotions
Ideal Anchor Setup
The ideal anchor setup for Distant Shores …
For nearly 25 years we have been cruising internationally and thousands of nights have been spent at anchor. We have had three boats (37 feet, 42 feet and 49 feet) with different anchoring setups, and we have had a variety of different anchors, both as our primary anchor and as our secondary anchors. We have anchored in the tropics, up and down the US East Coast, in the Mediterranean and in Northern Europe up to Norway's fjordland. And in many of those anchorages where the water is warm enough, I have swum down to check our anchor(s) and also others nearby so I have seen many different anchors perform in various conditions.

Here is the setup on our first boat, a 37-footer with a manual windlass and 40 meters of chain.
We have also seen a number of people having problems, dragging and using inadequate anchors or techniques for the anchorage.
Anchors have improved, there are more options for windlasses and other equipment has evolved over this past 25 years. Now there are fewer excuses for not having a ground tackle system that will allow the cruising sailor to anchor securely in a wide variety of situations. You can anchor confidently and get a good night’s sleep at anchor.
So here is a summary of our ideal anchor setup...
- Rocna or other newer generation anchor - We have had Rocna on our last two boats and they have been a big improvement over our old plow-style anchors. Especially the CQR which was much more difficult to set properly. For our current 49 footer, Distant Shores II, Rocna recommend a 33 or a 40kg model - we chose the 33kg (73 pounds) and it has been the most dependable anchor we’ve ever owned. (Rocna are one of the only companies I am aware of that recommend reasonable size anchors). I have read recommendations from other manufacturers for as low as 1 lb anchor weight for 1 foot of boat length. That would mean we need a 49 lb anchor for our 49 foot monohull. This is not enough in my opinion for real world cruising and secure anchoring with a good night sleep!
- all chain rode. We have 80 meters which is more than strictly necessary. If you needed to save weight 50 or 60 meters would be fine but more is nice especially in the Med when stern-to mooring. The 80 meters also allows us to anchor in very deep anchorages, but this would also be OK with 50 meters chain plus 30 meters rope spliced on. I recommend hi-test chain (we have used G4 but G7 is also an option if you need to reduce weight more). Definitely put the extra weight into the anchor not the chain. For example, 8mm G4 chain would save 30% of the weight of 10mm BBB chain and have similar strength. Then you can afford to upsize the anchor :-) - Note: The rode should be attached to a solid point in the anchor locker so that it will not all go overboard if you drop it all by mistake. For all chain rode this should be on a tail of rope long enough so the rope will come up on deck when the last chain is dropped. This way you can cut it easily if you need to drop the rode in an emergency.
- good windlass. You need something to pull in the chain with. Handling chain by hand can be dangerous. We have a vertical Lewmar V3 windlass which works well. We have also had horizontal windlasses on previous boats. Originally we had a robust Seatiger horizontal manual windlass which gave us 18 years of trouble-free operation. We replaced it with a Lewmar vertical windlass under the orders of the first mate who was tired of manually winching!
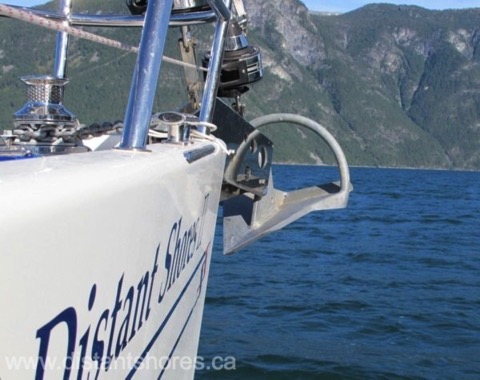
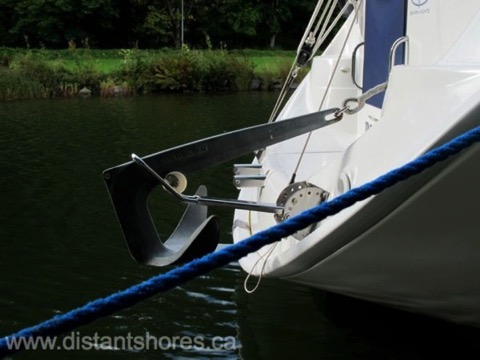
- good bow roller. Ideally the anchor will launch itself as you release the chain and not need to be pushed over. When you retrieve the anchor it will ideally come up (not swinging in to hit the bow) and store itself.
- anchor snubber - with an all-chain rode you need something to absorb the shock when the boat tugs hard and the chain straightens out. A snubber is a piece of rope that will stretch (3 strand nylon is best) with a chain hook or similar to connect to the chain. This attaches to a point on the bow so you can let out extra chain transferring all the load to the snubber. It also saves your windlass which was never meant to take strong loads of the boat at anchor. Catamarans generally use a bridle with two lines to the chain hook, and depending on your bow configuration this can also work well for a monohull.
- anchor washdown pump. I installed a saltwater pump and hose connection up forward to wash down anchor and chain as it is raised. In muddy areas such as parts of the US East Coast the anchor will need to be rinses and it is tiring with a bucket.
- anchor locker - the chain or rope-chain rode should store itself as it is raised. Sometimes chain will come up in a big pile which gets so tall it will interfere with the chain that is coming out of the windlass. Our current boat has a very deep locker so this doesn't happen even when all 80 meters of chain is brought up. On our old 37 footer the locker wasn't that tall and you could only bring up 30 meters or so before you needed to knock the pile down to make room for more chain.
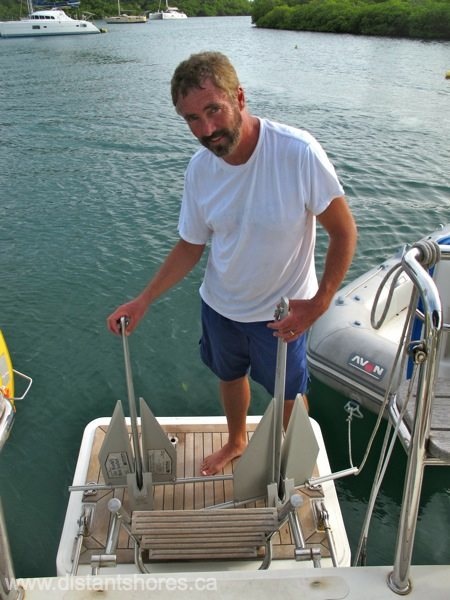
- spare anchors. We carry two additional anchors - a Fortress FX23 and FX37 which conveniently disassemble and stow in a nice bag. Similarly the Spade make an anchor that can take apart for easy stowage. On our 37 footer we also carried a small additional CQR anchor but for larger boats this is not practical. A reasonable size anchor will be difficult to lift and bulky to store (unless it disassembles). If you have a larger boat it might be worth trying to accommodate 2 anchors on the bow permanently so they do not need to be manhandled. But I would still recommend oversizing the primary anchor.
- spare rodes - we carry 4 additional rope anchor rodes. Two of them are stored nicely flaked so they will deploy easily in a bag. When I flake them carefully I can row out in the dinghy and the rope will run out of the bag without tangling making it easy for me to set the anchor myself. West Marine sell such bags and we are still using one we bought from them more than 20 years ago.
- stern anchor setup - we don't use this much but it came in handy in Scandinavia where many people will anchor and come bow in to the shore. We installed a reel with a flat anchor rode on the stern rail. Here is one of the many interesting setups we saw in the Baltic where this is common.
- Chain Counter - It is important to know how much chain you have out to calculate the proper scope. We tested an automatic anchor chain counter on our Southerly 42. It displayed the amount of chain on a screen at the helm and could also be used to raise and lower the anchor from the helm. It worked quite well and was especially nice to see exactly how much chain. On Distant Shores II we do not have a chain counter (I might add one) but have marked the chain in 10 meter lengths using electrical tie-wraps.
- We have an anchor alarm (see App article) to alert us if we drag or drift outside the range we have set up. Nice. You can also use a regular GPS plotter to check if you have moved but an actual alarm is better in case you sleep through a squall and the boat starts dragging.
Well there you go, our ideal anchoring setup - hopefully we have some ideas that might help you out in the quest for the perfect anchor setup so you can enjoy anchorages wherever you cruise. If you have any suggestions jump in with comments below! Post pix too!
Check out anchorages around the world with us aboard Distant Shores

Order the Super Pack on DVD and get Season 1-10 Downloadable.
Order the Super Pack on Vimeo and we will send you the code for Season 10 as a bonus. Email us for details.
Anchor Alarm App - Update
(Here is an update on our latest success in anchor alarm methods)
Having your boat snuggly anchored in a beautiful setting is a great highlight of the cruising life for many people. We love spending time at anchor but sometimes in the night when the wind shifts or a squall comes up you wonder if you are really so snug! Is the anchor dragging?
In the "good ole' days" we used our handbearing compass to take bearings on nearby shore features, but on a dark night that could be quite difficult. We might wake up to check our position and find the light ashore had been switched off, or the squall was obscuring the feature we we using to take a bearing.
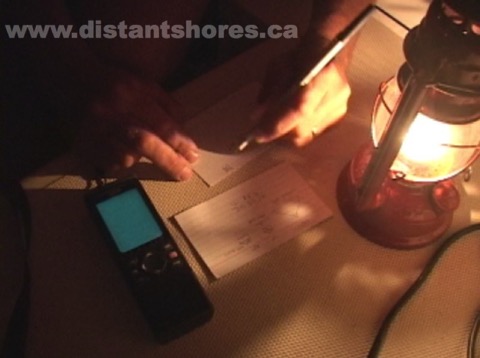
Then for a few years (before chartplotters were in common use) we were using our GPS - writing the numbers down and comparing them to the numbers we should see. A big improvement but prone to errors as we all are a little more muddled waking at 3AM with strong gusts!
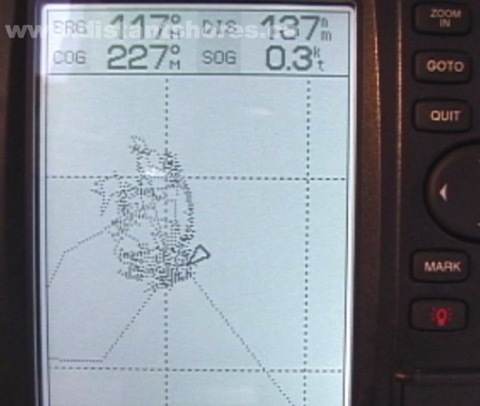
Back in those old days, there were crude anchor alarm features, but I never had much luck with them. GPS accuracy was poor and LORAN towers went down (remember LORAN :-). Getting a good nights sleep was still difficult.
Then GPS accuracy improved (SA was turned off) GPS got better reception and I put a small handheld plotter by the bed. I left the plotter on all night and it gradually developed a lot of fixes in an arc as we swung on the hook. Cool!! When I woke with a gust or squall I could just roll over and peer at the small plotter screen - we were still on our arc - back to sleep!
It still wasn't perfect system though. What if we had just had a large Sunday Roast dinner and a bit of wine and I didn't wake up with the squall.
Well I have finally found a solution that works GREAT in the form of an App for my phone! I have been testing it for some time, but they recently came up with an update and it is now really great!
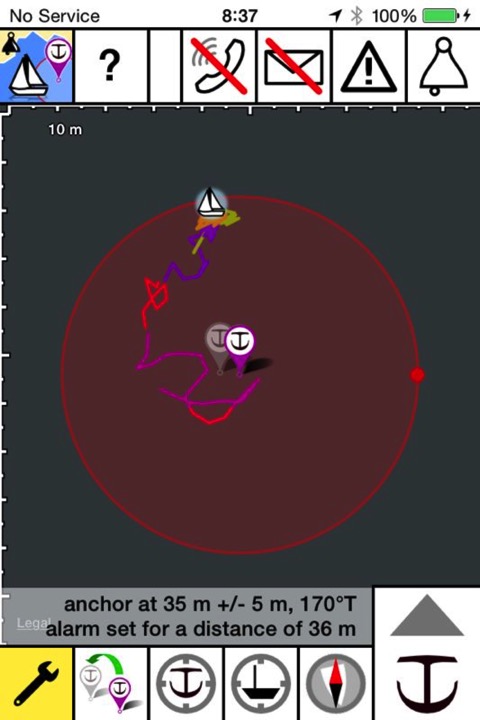
In this screen-cap you can see the boat to the left and the anchor in the middle of the red circle "safe zone". The previous track of the boat (in this case the past 20 hours) is easily seen in various colours so you can differentiate older positions from newer ones.
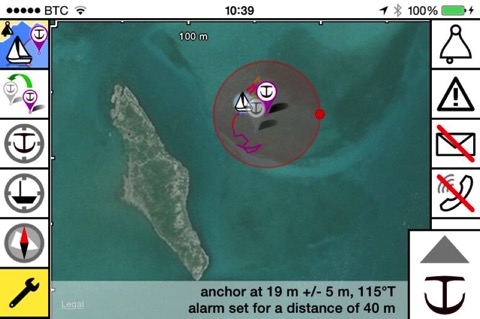
When the phone is online the App also grabs a satellite image of the surrounding area which I think can be quite helpful (although it won't work in all areas) Here we are in the Bahamas and the island next to us is Thunderball Cave near Staniel Cay Exumas. You can even see we are in nice sand between grass patches!! Ain't technology wonderful!!
If you have trouble sleeping at anchor this might be worth a try! Heck its just $1.99...
The app even has a feature that it can apparently call or text you if you drag… has anyone tried this?
This app is called “Anchor!” and is here on the Apple App store.
If you have an Android phone here is one for Android... Or has anyone tried any similar apps?
Summer Solstice in a Half-Tropical Island
Those who have been to the Southern Exumas in the Bahamas know it’s a special place. Warm “tropical” climate, blue waters, lovely white sand and friendly people. But on the Summer Solstice these islands are even more special as they highlight the fact we are “not quite” in the tropics.
Not quite??
June 21 2014 is the Summer Solstice - the point where the sun stops moving north and starts moving back south again. (The word solstice is from the Latin for "sun-stopping"). This northern-most point is marked by a line of latitude known as the Tropic of Cancer and passes right through the south end of Great Exuma. That's just 2-3 miles from where we are anchored in Exuma Harbour today.
So are we in the tropics? Well, literally, no we are not as we sit anchored off George Town. The Tropic of Cancer is just slightly south of here so most of Great Exuma is not in the tropics. But the southern tip of the island is. So it’s a half-tropical island. (The term semi-tropical refers to climate conditions rather than astronomical position.)
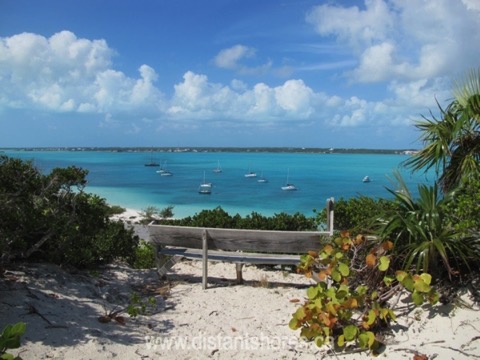
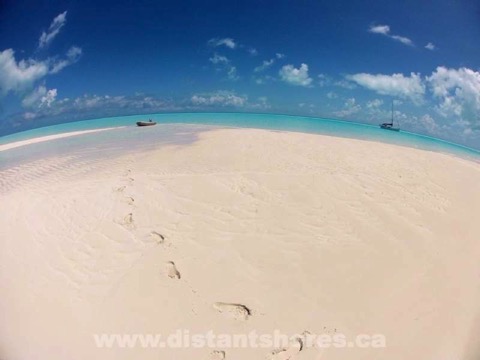
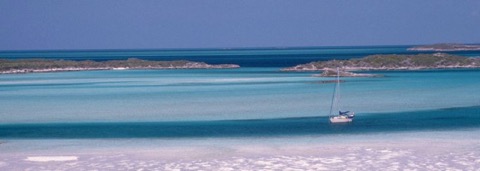
This anchorage at White Cay is just 1 mile south of the tropic. So if we anchored here we would see the sun very slightly north of us today at noon.
Cool!
FYI Here is a nice site with more technical information if you like.
How to Read the Colour of the Water
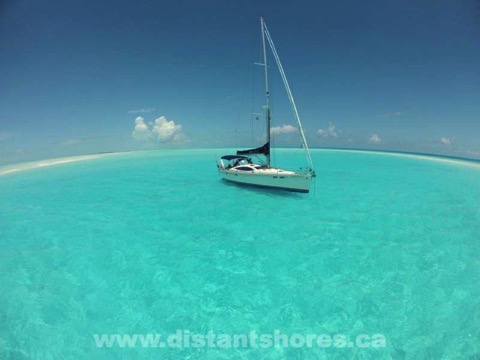
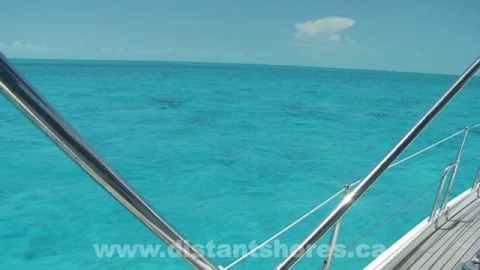
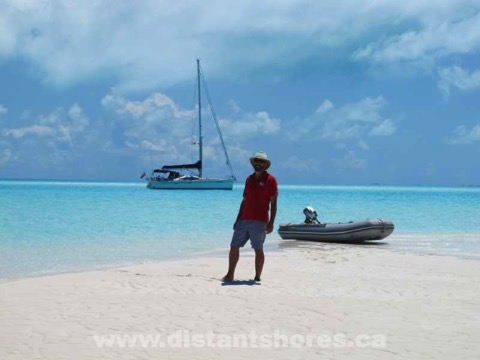
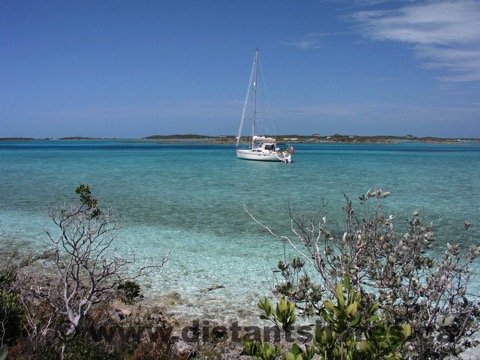
How deep is the water in the picture above? Could you anchor here?
If you want to safely cruise and enjoy the Bahamas or other shallow tropical destinations it is important to learn to read the depth by the colour of the water.
This picture is taken near White Cay south of George Town in the Bahamas. The light turquoise makes it look like a shallow swimming pool, and you can see that the bottom is all white sand. The blue colour of the water means that the light is travelling through enough water to change the light from clear to this blue colour.
The pale blue above means a bit more than 2 meters (6.6 feet) of water for us to see that level of “blue-ness”. So you would need a shoal draft boat to go in here.
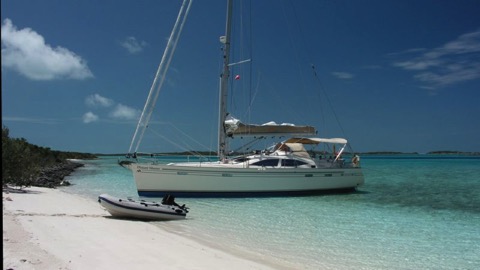
Here you can see the shallow water in the foreground (and far background) is less than 1/2 meter deep by the very pale blue-ness and to the right of the photo behind Distant Shores II is dry sand, therefore yellow. We are anchored in 2.5 meters.
Using the water colour to judge depth takes a bit of practice, and needs good light but is well worth the effort!
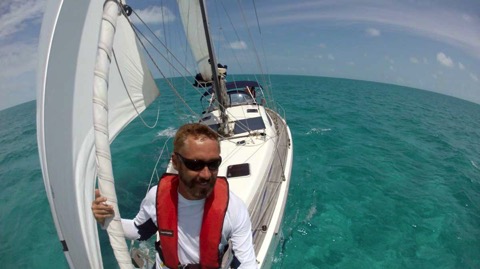
Keeping a close lookout using quality polarized sunglasses is important. If you are unsure if your glasses are polarized, you can tilt your head to see if the image changes. Looking at clouds in a blue sky you can see the sky get a darker blue. If you have an LCD display handy you can see if the image darkens when you tilt your head - then you have polarized glasses.
Here is a view with high sun through normal lenses... and below of the same view with polarized glasses.
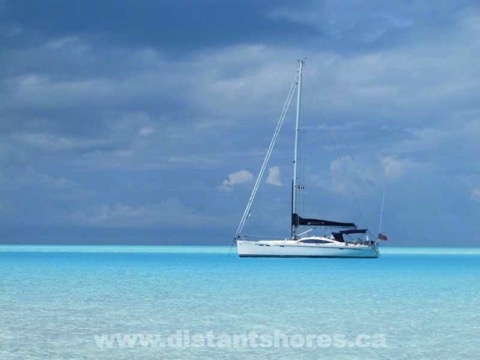
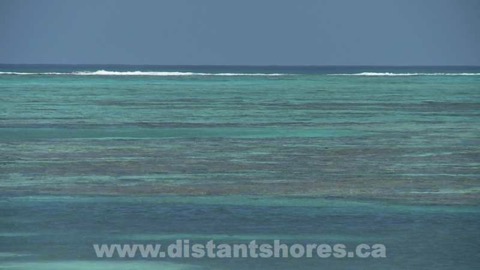
In this view you can see the water is quite a bit deeper. It is actually 4 meters - 13 feet deep and you can see a few small isolated rocks or small coral patches on the bottom. The patches are also deep so it is safe to navigate over them and you don’t need to dodge each one. If rocks are closer to the surface you can see them as sharper and darker colours.
Here is a shallow coral beachfront (in the Turks & Caicos of Provo). This is all a “no-go” area since the bottom is rocky reef. The water over the reef patches looks brown, and is less than 1 meter deep. Anytime the water has that brown look is too shallow - even for a dinghy!
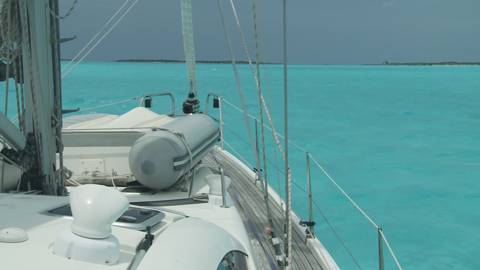
Below is an example of the water at 2 meters deep. We are approaching Hog Cay Cut in the Southern Exumas. Ahead you can see the cut as we leave the banks and approach George Town, Great Exuma. Note that a little further ahead you can see some slightly lighter colour water where it shallows to just 1.5 meters. Hog Cay cut is a tricky passage, and if you draw more than 1.5 meters is not recommended. There are spots with just 1 meter of water depth so most boats need to use a high or middle tide to get the extra water to make this passage safely. We are coming through on half tide and indeed find just 1.5 meters of water.
Finally here is a nice shot of the anchorage in George Town off Stocking Island.
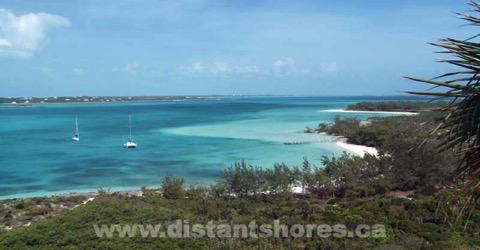
The water is less than 1 meter deep in the shallow bank in the centre of the photo. The main anchorage is mainly 3-4 meters deep and you can see grassy patches where it might be a little shallower. Anchor in the sandy bits for good holding and to enjoy your shallow water paradise!
For more information on shallow water piloting check out “Cruising the Bahamas”, a one-hour video available on DVD and download as well as in the Bahamas/Caribbean Gift Pack of Distant Shores DVDs. All good resources for planning your upcoming cruise.
You Might Also Like the following...
Shallow Water Piloting
Tuning the Rig
About the Southerly 49
Top 10 Canal Journeys
Shallow Water Piloting
Ahhh Bahamas. Could this be the most beautiful water in the world?? Tough to judge for the whole world, but for many people the Bahamas are the best! And for American and Canadian sailors on the East Coast the Bahamas are the achievable paradise.
But beautiful as they are, the same shallow seas (Bahamas means shallow seas in Spanish - baja mar) can be a concern for sailors new to the practice of shallow water piloting. And its not just for shoal draft sailboats! Even with our old non-shoal draft sailboat with 6 feet draft we used these techniques and enjoyed shallow draft cruising grounds.
Sheryl and I have cruised these islands many times over the past 25 years and spent altogether 14 months cruising the shallow seas of the Bahamas.
Navigation has changed here with the advent of pinpoint accurate GPS and plotters but most of the techniques for safely navigating here have not changed. There are few aids to navigation in the Bahamas. Sand bars shift and reef grow.
10 Navigation Tips for Successful Shallow Water Bahamas Piloting
- Time your passage. It is easiest to judge water depth with the sun over your shoulder. High sun works best - 930 or 10 until 3pm or 3:30 will be best. Try not to come straight into the sun especially when it is lower on the horizon. Do not navigate at night! Rising tide means you can get off again if you get stuck.
- Do not rely exclusively on waypoints. Cruising Guides have waypoints and they are useful but these are not designed to be used alone. Keep a lookout as well even when running point to point. For new places or routes we haven’t tried, Sheryl and I will check both our charts plus cruising guides for additional information when planning a trip.
- Know your boat’s draft and tolerance to running aground. Can you afford to run aground? If you have exposed rudders or propellors be sure not to run aground. What is the calibrated offset of your depth sounder? Is the offset calibrated to the bottom of keel or to the water surface?
- Wear polarized sunglasses. They cut the glare on the surface of the water so that you can see down into the water much better when wearing polarized glasses.
- Keep a good watch. Height helps - have a lookout standing on the cabin top or other high point. Do not look through windows or cockpit enclosures. Keep a sharp lookout. Post a lookout at the bow. Do not rely completely on Electronics.
- Slow down or stop when unsure.
- Learn to judge the depth by the water-colour. Deep sapphire blue to swimming pool blue to pale yellow is all sand. Deep green or gray-black will be deeper water of 3-5 meters over grass or reef. Brown water will be quite shallow water over reef or rock - less than 1 meters. Judge depth over sand from sandy colour (less than 0.5 meter - 2 feet) very pale light blue (1 meter) to deep blue. (I will go into this in more depth in my next Tech Blog, “How to Read the Colour of the Water” since it is an important skill for skippers to develop to ensure a safe and happy cruise.) .
- Practice with your depth sounder. Judge the depth ahead (for example, picking a shallower sandy patch) and confirm your estimation as you pass over this patch. Explore ahead in the dinghy and confirm depths with a lead-line.
- Try out a Lead-Line. On our first trip to the Bahamas in 1989 friends gave us a lead-line neatly designed for our boat (which drew 6 feet). It was a 20 foot piece of thin cord and had ribbons tied every 2 feet with a fishing sinker on the end. The ribbons at 2,4 & 6 feet were red indicating depths we couldn't go. 8,10 & 12 were yellow and 14,16 & 18 indicated we could easily anchor here. Great for scouting in the dinghy or for checking depth off the stern...
- Be careful in cloudy conditions. The small trade-wind clouds common to the (otherwise) perfect sailing day in the Bahamas can cast a shadow on the water that look just like a black reef patch. The clue is to carefully watch the bearing - if the bearing changes then it’s a cloud. If you are unsure, head around it. When you get closer it’s easier to see if it’s really a reef. Not all clouds pose a problem. Soft clouds or on a high-cloud dull day it is still relatively easy to judge water colour.
Here is a video on the first time we beached our Southerly 42 in the Bahamas
We love the Bahamas and enjoy the challenge of piloting in the amazing blue waters here. A little preparation and practice will allow you to safely navigate this wonderful cruising ground.
Join our email list and get hints, technical articles and tips plus videos to help you achieve your cruising dreams.
- FREE 1/2 hour video on cruising the Exuma Islands in the Bahamas
- Technical Blog shows you how to deal with issues facing the cruising sailor
- Destination information from some of the world's best cruising areas
- Special discounts and promotions
Raymarine Plotter Upgrade
How about doing an upgrade that is absolutely free and just takes a few minute? Many of the new Multifunction displays (MFDs) allow you to upgrade them with new versions and new functionality as it becomes available. Our Raymarine MFDs e95 + e125 9 and 12 inch units respectively have just had an upgrade and I am very impressed. There is a big jump in functionality, especially if you sail in US waters and we are heading there in the next few weeks. Apparently the NOAA charts are now available to run on the plotters, and even better they are free - both as raster and vector versions.
Upgrading
The process is quite simple these days. No visiting a dealer, rewiring, or anything. You just need a reasonable internet connection as you will be downloading the files. In this case the main file is 700MB or so. However I also will want to download the new charts for the US waters. These are also free but are larger at 2GB for the whole shebang! So far I have just done the software upgrade - not the charts. Perhaps I’ll try it out at dinner tonight at Saba Rock :-) with their excellent free wifi?
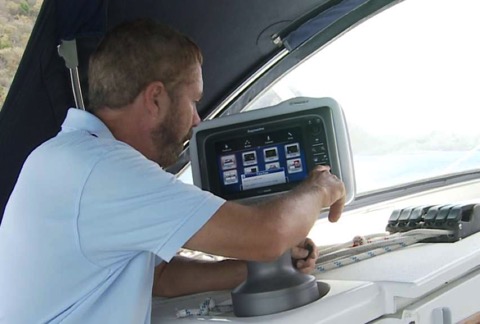
Once downloaded, you can follow along with a simple procedure (here) . Basically put the files on a blank microSD chip, backup your user data from the MFD, and then boot with the microSD in the slot. The boot / upgrade process went quickly and had no hiccups. Clear the cache, then reinstall my user data (waypoints and tracks) and "Bob's your uncle" the new "Lighthouse" software is up and running. Repeat for additional plotters.
I'll be testing the new software the next few days before we head off on our passage to the Bahamas in the next couple of days.
And as soon as I get a decent internet connection I will download all those free US charts that now work on my Ray MFDs. Cool!
Whichever system you use, it might be worth checking if there is an upgrade available. The modern systems offer these upgrades but if you don't check you might be missing out on a sweet deal!
Have you updated your plotter software recently?
Servicing Your Winches
Why service your winches? Here is one item on deck that can outwardly appear to be in good shape and actually be ready to fail. And when it fails it could easily injure a crew-member, or worse!
I have met a number of sailors who are not aware of this danger, and have never serviced their winches. I think they should be serviced at least once a year, more often if they have taken a wave over them or if you have any indication they are not working properly. We know many cruisers who never service them and that is a real serious accident waiting to happen. It shouldn't take more than a couple of hours to do all of them.
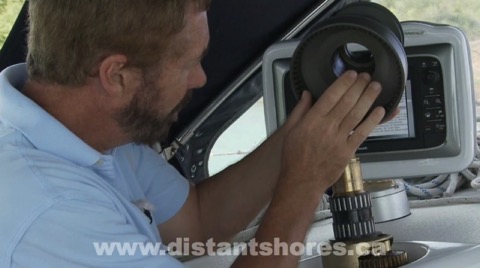
Now admittedly winches can be a bit daunting if you have never taken one apart before. The first time you open up a winch it seems to have a number of gears, and bearings and other bits, so it is important to be organized here. Keep diagrams or instructions for your particular winches handy - I sometimes photograph the winch as I take it apart to help reassemble. I have now put the Lewmar manual up on our plotter so it's nearby as I service it.
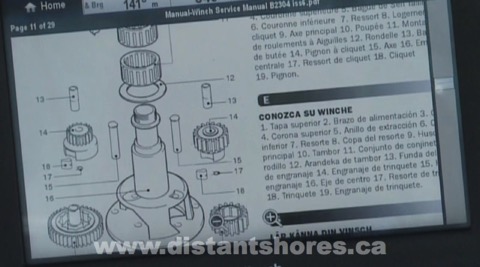
Set up an area to lay out the parts to organize them and make sure nothing goes overboard!
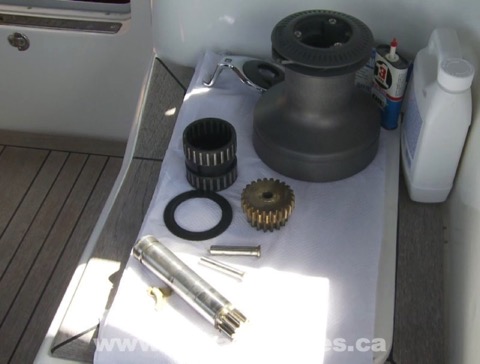
Remove the top and check the main bearings. They will likely need cleaning and then a light coating of the winch manufacturers recommended grease. If the winches have been neglected this step could take longer. I clean the bearings with mineral spirits and a toothbrush in a bowl. We want to remove the old grease and replace with a light coating of new grease. Gears receive the same treatment but be careful NOT to get any grease in the area of the pawls (see below).
I think the most important element in servicing the winches are the pawls. These are small ratcheting mechanisms that allow the winch to turn one way but not the other. A single speed winch will have one set (of two pawls), a 2 speed winch will have 2 sets. So a typical 2-speed winch will have four pawls. It is the pawls that can cause the injuries with a winch. A broken spring, or a little sticky grease and some dried out oil will mean the pawl won't move freely. In the event that one of the pawls has got stuck and is not clicking out properly, the winch will still work fine. But only one pawl is now working. So if that second pawl sticks the winch will spin backward - spinning the handle too if it is left in place.
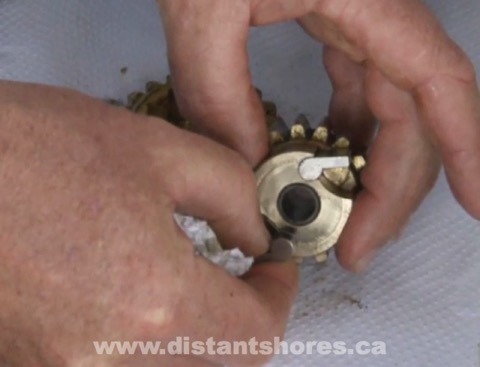
Check the springs are in good condition - replace if not perfect - and that they are moving freely. Most important never to get grease in this area it can stick the mechanism - they just need a light machine oil.
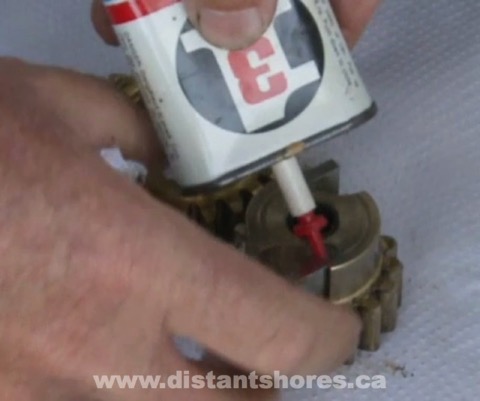
Now the whole thing goes back together. Check that the pawls are moving freely, bearings spin easily and all looks as it should.
Refer to the diagram as you reassemble and make sure there are no parts left over when you have completed this winch :-)
Move on to the next winch… it will be easier now you know how your winches work!
Our Lewmar winches are beautiful pieces of engineering and very reliable! Check out Lewmar here
Safe Sailing
You Might also like the following...
Tuning the Rig
About the Southerly 49
Top 10 Canal Journeys

The Miracle of Radar
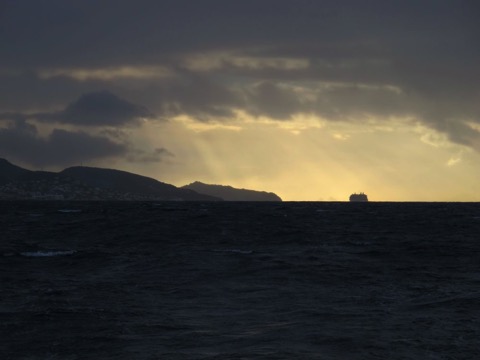
We are up in the dark and raising anchor before dawn. It is a Caribbean morning with a salt tang blowing a flukey breeze off the beach and St Martin's distinctive lagoon behind. The high bulk of the island to the east hides the orange glow of sunrise and shades us from the trade-winds. Five large cruise ships are approaching from the southwest, steaming past us toward Philipsburg. It will be busy in St Martin today. But I am looking forward to a day at sea after our time in this bustling island.
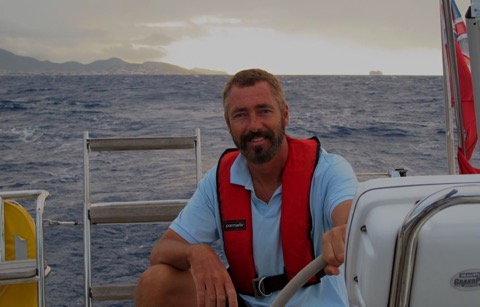
Morning reveals a grey sky, a high grey dome of clouds with isolated heavier clouds and showers marching out of the east. Perhaps we won't have our normal trade-winds today. I flip on the radar to take a look at the approaching weather. I normally use the chart mode to see showers with the radar overlaid on the plotter in purple. Zooming out to see the surrounding islands I put the radar on its 48 mile range and there are the showers, a nice soft purple splotch coming up past St Barths . Over the next few minutes I plot the shower putting waypoints on it's centre until I see its approximate path. Looks like it will skim past us to the north, so I adjust course a bit further south to see if we can avoid it altogether.
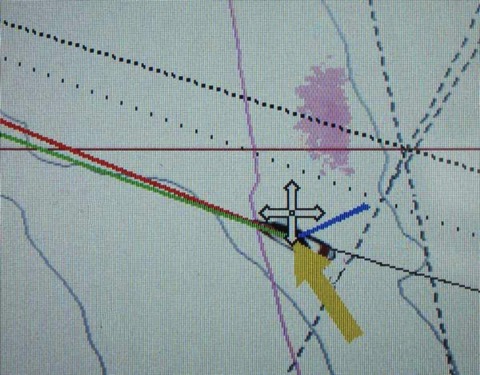
What a miracle that we can have this technology of Radar on our boats! Radar is a system that uses transmitted radio waves to determine the range and direction of objects. Radar (from RAdio Detection And Ranging) sprung from 1900's technology and came into effective use in World War II, where it was influential in the outcome of some major battles. German aircraft were detected approaching for the Battle of Britain in 1940, and at sea the first ships with Radar had a huge advantage against those without. Imagine opposing fleets on a dark mediterranean night, one with radar picking out the opposition, and the other essentially blind!
Today's modern radars benefit from dramatic improvements on this technology. Our current unit (an 18 inch Raymarine 418HD radome) uses a miserly 60 watts. A detailed image of reflected targets up to 48 miles away but using just the power of a 60 watt lightbulb! By concentrating that power into short bursts we can shine a 4000 watt pulse and catch the reflection as far away at 48 miles!
Reduced visibility and working in the dark is another big advantage of Radar. With flukey winds we have a slow passage from St Martin 80 nm across the Anegada Passage and our planned arrival in Virgin Gorda in the British Virgin Islands slips to 9 o'clock. We know the channel having done it several times, most recently just a few months earlier, otherwise we wouldn't attempt a night approach. But even with local knowledge and the weather clearing as we near Virgin Gorda it is very nice to have the radar on again, picking up small craft, and confirming the chart as you can see the island overlaid nicely in purple.
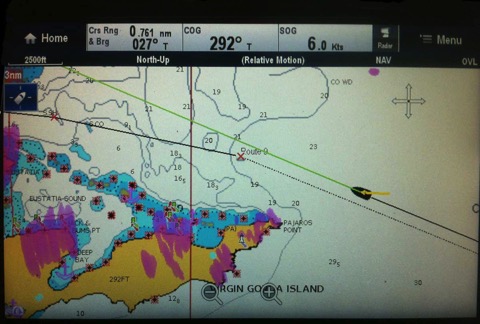
Note also the target showing as a purple dot on the top right of the screen above. The radar shows this boat is nearly a mile north of us, so we can keep an eye on him even though he is not properly lit and would otherwise be a bit of a worry. Another nice use of the radar!
Here are a few other uses for radar…
- Foggy conditions - extremely good in this situation it is a huge stress-reliever.
- Picking up buoys on approach in the dark or fog (set the radar to close range for this (our Raymarine radar has a "buoy mode" with tuning set for this)
- Confirming chart data for new areas we haven't visited - you can see the chart lines up with the "real world" as shown by the radar.
- Confirming AIS targets as the two will overlay revealing other non-AIS targets
Radar is an extremely powerful tool for the cruising sailor.
You Might also like the following...
Tropical Storm Chantal Arrives
Making Money While Cruising
Maintaining a Homebase
About the Southerly 49
Top 10 Canal Journeys
Sailing a Serious Ocean
Sailing a Serious Ocean is the same. John describes some of the most harrowing and exciting ocean conditions he has encountered, and with humility and clarity describes what he did right and wrong. As with all of John's books, his writing is evocative and he paints a picture of offshore passages. Winds blowing, waves crashing aboard, sails strained past the breaking point. But his stories are rich with technical details and perfect for those with less experience hoping to learn more. Each chapter also has additional sidebars that expands on details, such as "thoughts on waves" "weather information sources" "features of a bluewater yacht" and more. The combination of well-told stories and clear technical details makes a very readable format. The book that has got enough hard information presented alongside that you have gained real usable knowledge by the time you get to the end. And you have an excellent insight into the mindset of a fantastically experienced sailor. You might even find yourself signing up for a passage with John to learn offshore sailing yourself. Did I mention he offers offshore training? (www.yayablues.com)
Chapter Seven "Storm Strategies" - for this chapter alone the book is worth the price! But the whole book is a gem. Do yourself a favour and pick up a copy of "Sailing a Serious Ocean". After you have perused it and appreciated John's experience and storytelling, you can refer back to it as you plan your own passages on the Serious Ocean. I am tying in a third reef and going out to practice "Heaving-to" and "Forereaching".
You can pick up a copy from John’s website or from the Nautical Mind in Canada.
Getting Out There!
Lin and Larry Pardy, John and Amanda Neal, Liza Copeland, Pamela Bendall and Tania Aebi all attended, giving an outline of their sailing history and advice for cruising sailors working towards their own adventures.
Way back in the 1980s when Sheryl and I were getting ready to set sail for our first long-term cruise, we attended a seminar with Lin and Larry Pardey (as well as read all their books) getting much valuable advice.
"Go Small, Go Simple, Go Now" has always been the Pardeys' advice, and although Sheryl & I didn't start off quite as simply as the Pardey's, we did the essential ingredient "GO"!
"GO" was also the most powerful message from this Google Hangout and was repeated by all the participants, "Go cruising!". Do not wait until everything is perfect, installing more and more equipment, getting a larger boat… Do not wait until it's too late!
This blog usually concentrates on the technical aspects of setting up your boat for cruising, and I hope will be able to help cruisers enjoy an improved and safer voyage. But do not let anything obscure the main goal "Go Cruising!
See you on the water!
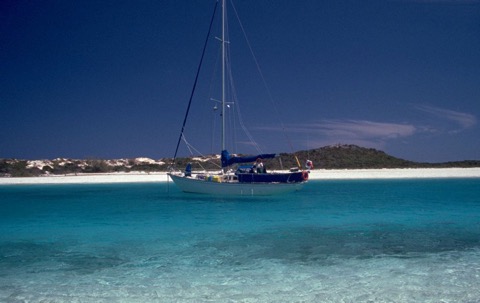
Our first boat was a 37 footer. Small inside compared to modern boats she was simple and sailed us many miles to MANY adventures.
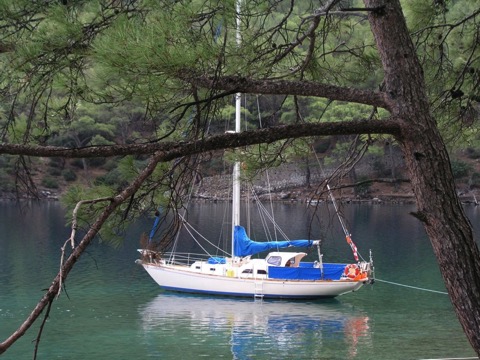
Two-Step didn’t have a lot of equipment when we started out. We added what we needed as we went along. The windvane and radar were only added after 2 transatlantic crossings.
